
Triple-pane windows can deliver measurable savings in Utah, but the installation itself determines whether you receive that performance. PNNL field studies found that thin triple-pane upgrades improved window energy performance by 40% or more, with average heating savings of 12% and cooling savings of 28% in controlled Lab Homes tests (U.S. Department of Energy).
You're probably looking at a fogged double-pane unit, feeling a cold draft near the living-room glass, or watching condensation collect along a sill during a Wasatch Front winter. The sales pitch makes triple-pane glass sound like the whole solution. After installing hundreds of windows in Utah homes, I've found the glass is only one part of the result. A premium unit installed with poor flashing, a crooked jamb, or blocked drainage can lose much of its value before the first heating season ends.
Utah makes the details harder to ignore. Salt Lake Valley homes deal with winter inversions, dry cold, strong summer sun, and large temperature changes between seasons. Homes in higher elevations face more severe cold exposure, while southern Utah properties may spend more of the year managing solar heat. The right product and installation method depend on the opening, the exposure, the existing frame, and the way the house handles air and moisture.
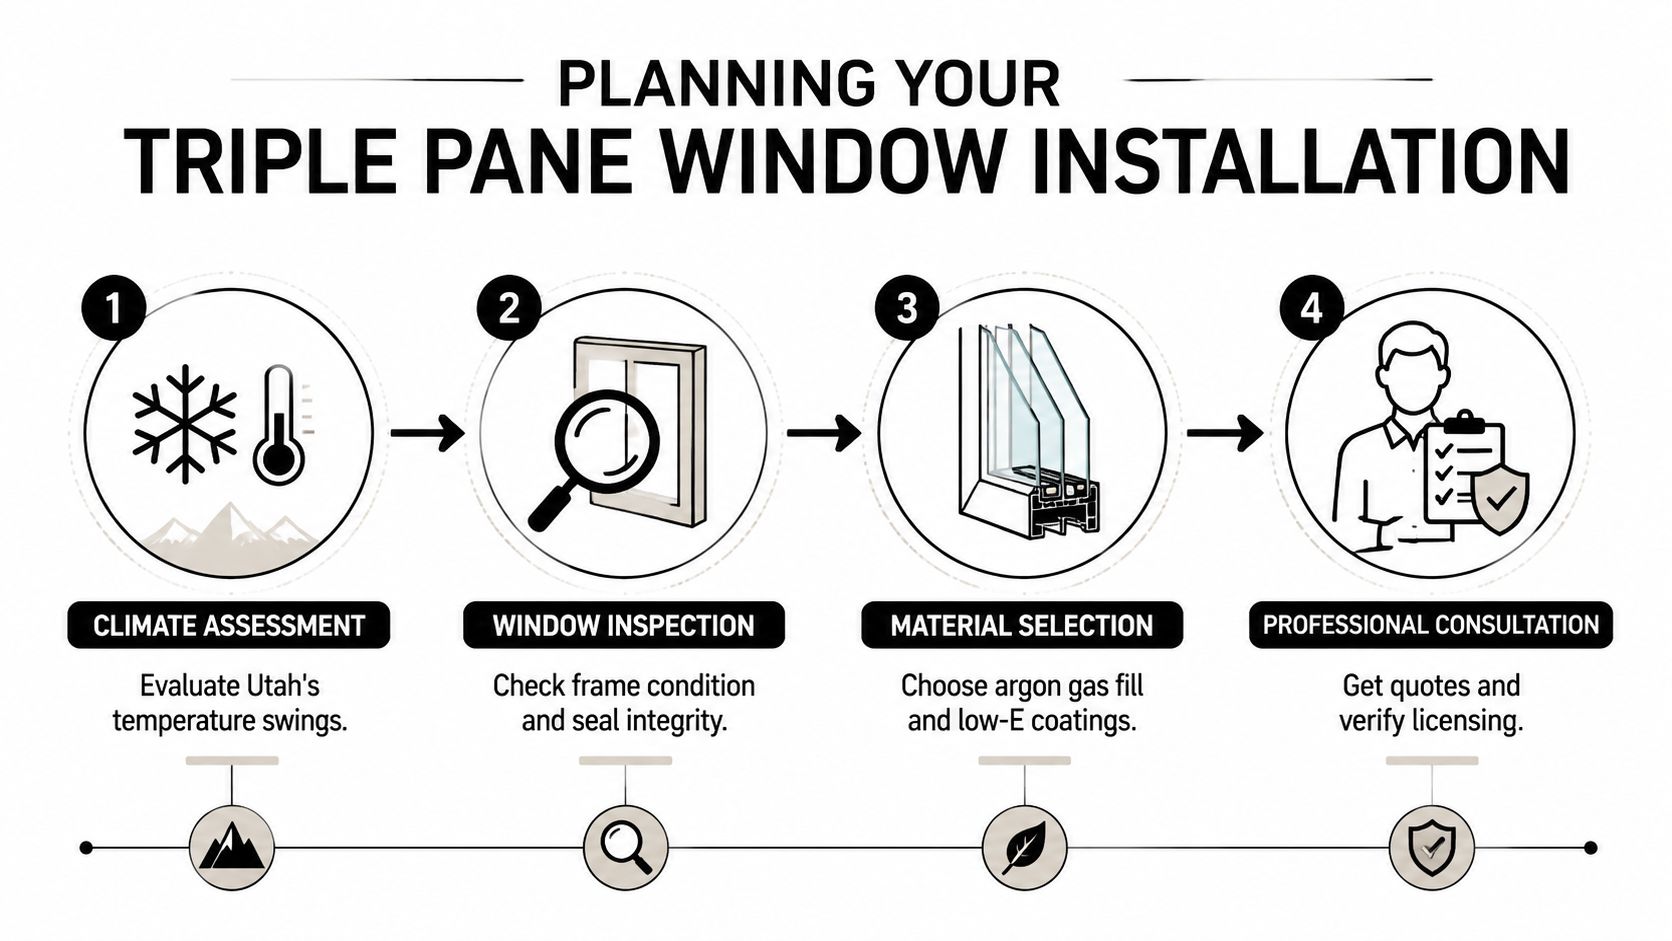
Planning Your Triple Pane Window Installation
Good triple pane window installation starts before anyone removes a sash. Begin by walking through the home and recording which rooms feel uncomfortable, which windows show failed seals, and where outside noise or direct sun creates a problem. A thermal camera can help identify cold edges and air leakage, but it won't replace a physical inspection of the sill, jambs, trim, and surrounding wall.
Utah homes often hide damage beneath interior casing. Probe questionable wood, look for staining below the corners, and inspect the exterior cladding for cracked sealant or failed joints. If the opening has rot, movement, or water damage, covering it with a replacement unit won't solve the underlying issue.
Choosing retrofit or full frame
A retrofit installation places a replacement window inside or against the existing frame. It usually preserves interior and exterior trim, which can reduce disruption, but the old frame remains part of the assembly. That can limit the visible glass area and leave hidden leakage or decay untouched.
A full-frame installation removes the existing unit down to the rough opening. The crew can inspect framing, replace damaged material, install new flashing, and build a continuous air and water-control layer. It creates more work for the trim crew, but it's the safer choice when the frame is damaged, the opening is out of square, or the old installation lacks reliable drainage.
Practical rule: Choose the method based on the condition of the opening, not only on the lowest initial estimate.
Measuring and preparing the home
Measure width and height at multiple points, then check the diagonals to identify a skewed opening. The contractor should use the smallest reliable dimensions while allowing the clearance required by the manufacturer. Triple-pane units are heavier, so the sill must be sound and the frame must be able to support the assembly without forcing it into place.
Before installation day, remove blinds, curtains, furniture, and wall decorations near each opening. Ask the contractor how they'll protect flooring, manage removed glass, and handle alarms or security sensors. A written opening-by-opening plan should identify the product, installation method, interior finish, exterior finish, and any repairs needed before the window arrives.
Step-by-Step Installation Process
A careful crew treats the opening as a weather-control system, not a hole that needs a window pushed into it. The work begins with protection inside the room, careful removal of the old unit, and preservation of surrounding finishes wherever possible.
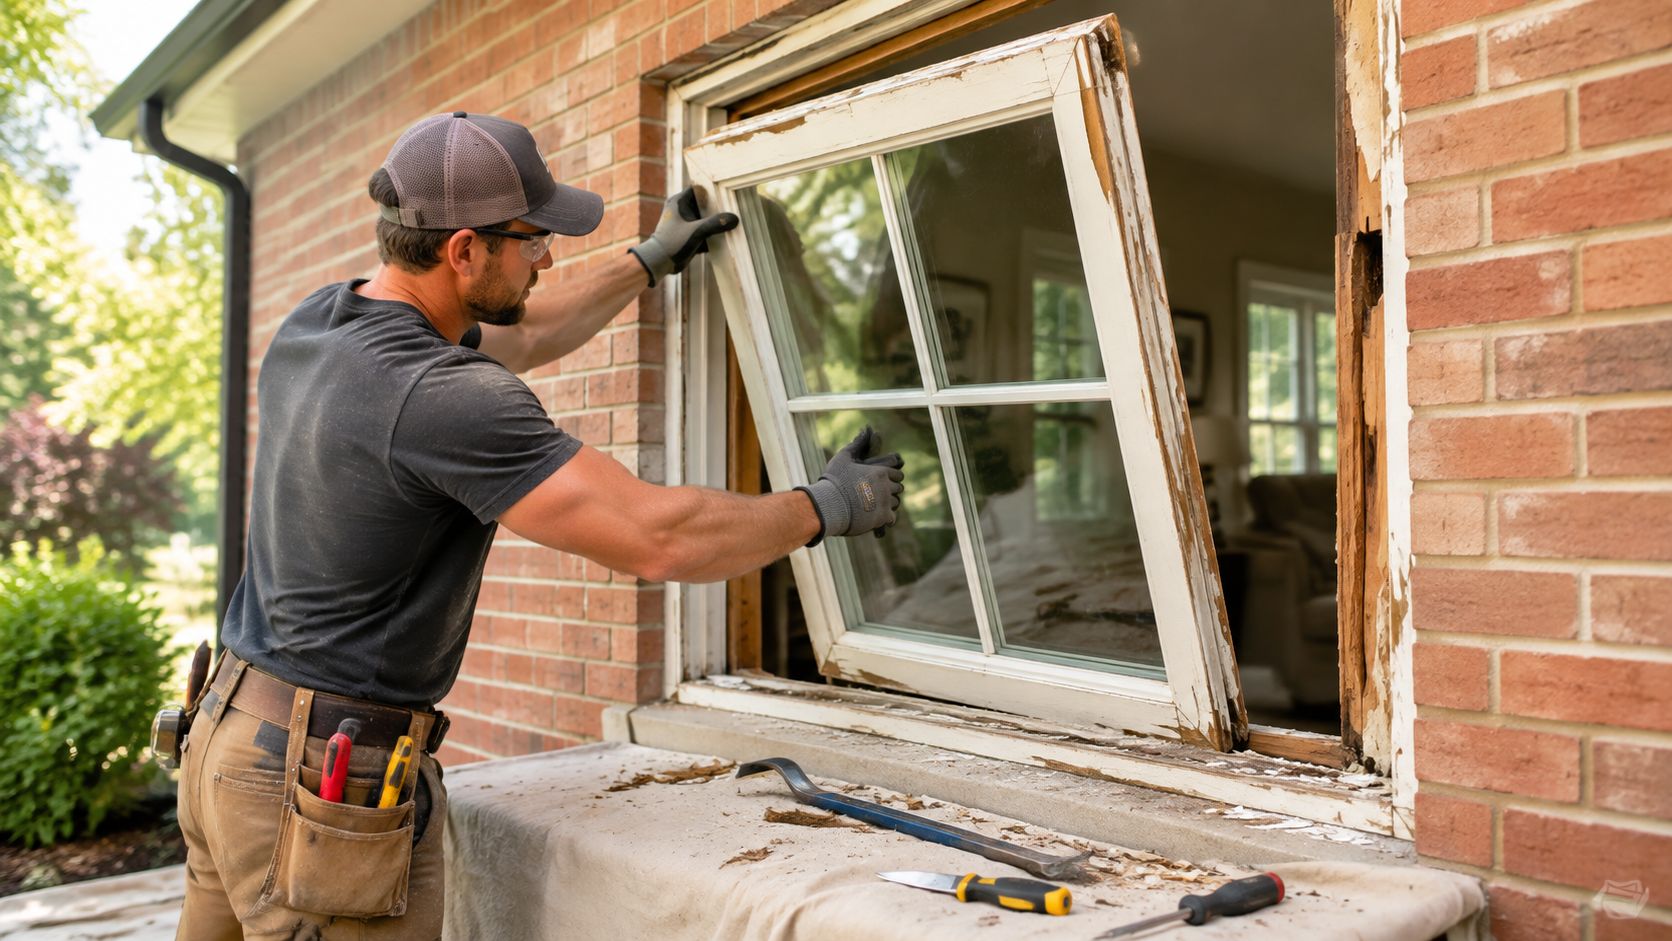
Removing and inspecting
The installer removes the operable sash, then cuts through fasteners and sealant rather than prying against the drywall or masonry. Broken glass must be controlled, especially in older homes where brittle glazing compounds or hidden nails can release unexpectedly.
Once the frame is out, the crew checks the rough opening for rot, loose sheathing, deteriorated sill material, and signs of previous water entry. The opening should be clean and structurally stable before the new unit is set. Debris left beneath sill flashing can create a raised point that prevents proper drainage and leaves the frame sitting unevenly.
Building the water and air-control layers
The sill pan or sill flashing goes in first, with end dams and a positive path toward the exterior. Jamb and head flashing must overlap in the direction water naturally drains. Reverse-lapped flashing is a serious failure because it can direct water behind the weather barrier instead of over it.
The installer then applies compatible sealants and flashing tapes according to the window and weather-resistive-barrier requirements. Caulk shouldn't cover drainage paths or weep openings. A sealed window that cannot drain is not weather-tight. It's a water trap.
Setting the heavy unit
The crew sets the window on properly located support blocks, centers it, and checks the sill for level. The jambs must remain straight and parallel. Misaligned jambs can cause binding sashes, uneven weather seals, and locking problems that homeowners may mistake for defective hardware.
Fasteners should follow the manufacturer's locations and spacing. Overdriving them can distort the frame, while under-supporting the unit can allow movement. The installer operates each sash during the process instead of waiting until the trim is complete.
Insulating and sealing
Low-expansion window foam or another approved insulation fills the perimeter gap without bowing the frame. Foam alone isn't an exterior water seal, and caulk alone won't provide durable insulation. The finished assembly needs a coordinated interior air seal, insulated perimeter, exterior seal, and functioning drainage plane.
For a smaller exterior window project, homeowners can review these DIY storm window steps to understand the basic sequence and safety concerns. A full triple-pane replacement is more demanding because of unit weight, flashing integration, and the consequences of a distorted frame.
A final inspection confirms that the locks engage, the sashes travel freely, the weeps remain open, and the interior and exterior seals are continuous.
Costs, Timeline, and Energy Performance
Triple-pane installation is a premium project, but a responsible estimate must separate the window unit from labor, trim, disposal, repairs, flashing, and insulation. Utah homeowners should ask for an opening-by-opening proposal rather than accepting a single figure for the entire house. That format makes it easier to identify whether a lower bid excludes sill repairs, interior casing, exterior trim, or full-frame work.
Project duration depends on the number of openings, access, weather, and the installation method. A straightforward replacement can move efficiently when the crew has the units staged and the openings are sound. Full-frame work takes longer because the installer may need to repair framing, rebuild flashing, and restore interior and exterior finishes. Any contractor who promises a fixed completion schedule without inspecting the openings is guessing.
Reading the performance label
The U-factor indicates how readily heat passes through the window assembly, and a lower value generally represents better resistance to heat flow. The solar heat gain coefficient, or SHGC, helps describe how much solar heat enters through the glazing. Utah homeowners should review both rather than selecting a window based only on the pane count.
A south-facing room with winter sun may benefit from a different glass strategy than a shaded north-facing bedroom. East and west exposures deserve special attention because low-angle summer sun can create uncomfortable heat even when the rest of the home feels moderate.
PNNL found that replacing clear-glass double-pane windows with thin triple-pane units reduced annual residential energy use by about 16% in heating-dominated climates, 12% in mixed climates, and 7% in cooling-dominated climates (PNNL field study). Those findings support a climate-specific decision, not a blanket promise that every Utah home will receive identical savings.
Looking beyond utility bills
The same validation work found average HVAC peak power reductions of about 17% in winter heating, roughly 650 watts, and 33% in summer cooling, about 1,200 watts compared with baseline double-pane windows (field and laboratory validation study). In practice, homeowners often notice the result first as fewer cold spots, less radiant chill, and steadier room temperatures.
Choosing the Right Windows for Utah Climate
Utah doesn't have one window climate. A home in Logan faces a different heating burden than a property in St. George, and a shaded foothill house behaves differently from a west-facing Salt Lake Valley home. The product should match the exposure instead of treating “triple pane” as a complete specification.
Glass and coating choices
Most high-performance units use sealed cavities with insulating gas and low-emissivity coatings. Argon is a common practical choice, while some manufacturers offer krypton for specialized designs. Ask for the complete NFRC performance label, including U-factor, SHGC, visible transmittance, and air leakage, so you can compare assemblies rather than marketing names.
Low-E selection requires balance. A coating that limits summer solar gain may improve comfort beside a hot west-facing window, while a different configuration may preserve useful winter sun. The best recommendation considers orientation, overhangs, interior shades, and HVAC design.
Noise is another legitimate reason to upgrade. In PNNL Lab Homes, thin triple-pane windows reduced sound infiltration by 8 to 10 decibels compared with baseline double-pane windows (PNNL technical report). For a home near a busy road or multifamily property, acoustic performance can matter as much as the heating calculation.
Frames, spacers, and operation
Vinyl frames are low-maintenance and widely available, but the frame design, reinforcement, and drainage details matter more than the material label alone. Fiberglass, composite, and wood-clad options can provide different structural and appearance benefits. Compare the frame sightline, sill design, hardware, and service support.
Warm-edge spacers can help keep glass edges warmer and reduce condensation potential, but they can't compensate for excessive indoor humidity or a leaking perimeter seal. Triple-pane units also weigh more than double-pane products. Large operating sashes need correctly sized hardware, strong support, and careful adjustment.
Utah's dry winter air doesn't eliminate condensation risk. Research cited in PNNL material found a baseline window had condensation potential across about 40% of the interior surface area under test conditions (PNNL technical report). That result makes frame choice, warm-edge details, indoor humidity, and installation quality part of the same decision.
Quality Checks and Maintenance After Installation
Don't judge a new window by clean glass and fresh trim alone. Test the parts that control movement, drainage, air leakage, and water management before the crew leaves.
The handover inspection
Open and close every sash several times. Confirm that locks engage without lifting or forcing the handle, screens fit correctly, and the reveal around the sash looks even. Run your hand around the interior perimeter on a windy day, or use a smoke pencil carefully near suspected leaks.
Inspect exterior sealant for gaps, skipped joints, and caulk bridging drainage openings. Look at the sill for a clear drainage route. If the contractor used expanding foam, check that it hasn't bowed the jamb or made the sash bind.
Before signing off: Ask the installer to demonstrate the weeps, explain the warranty exclusions, and show you where maintenance instructions are stored.
A practical maintenance routine
Clean glass with a non-abrasive solution and a soft cloth. Avoid blades or aggressive scraping that can damage coatings. Keep tracks free of grit, vacuum the corners, and lubricate hardware only with the product recommended by the manufacturer.
Inspect exterior sealant periodically, especially after intense sun, freeze-thaw cycles, or stucco work nearby. Watch for interior condensation, fogging between panes, peeling sealant, staining, or a sash that gradually becomes harder to operate. Those signs should be reported promptly because a small adjustment is easier to address than concealed moisture damage.
Indoor humidity also matters. Use bathroom exhaust fans, vent dryers correctly, and maintain reasonable ventilation during cold weather. A high-performance window reduces condensation risk, but it can't overcome persistent moisture production combined with cold surfaces elsewhere in the room.
Warranty, Permits, and Selecting a Contractor
A triple-pane window contract should describe more than the brand and color. It should identify the glass package, frame, spacer, hardware, installation method, perimeter insulation, flashing approach, interior finish, exterior finish, debris removal, and responsibility for concealed damage.
Read the warranty in two parts. The product warranty may address glass seals, hardware, frame components, and coating failure. The labor or installation warranty addresses problems caused by fitting, sealing, flashing, or adjustment. Ask who handles a failed seal, whether labor is included, how service requests are submitted, and whether the warranty changes if another company performs future repairs.
Utah permit requirements can vary by city, project scope, and whether the work changes structural openings or exterior conditions. Your contractor should identify the applicable local requirements before work begins and explain who will obtain the permit and schedule inspections. Don't assume a replacement that looks simple from inside has no administrative requirements.
Comparing contractors on the work itself
A good bid meeting should include an inspection, not just a product presentation. Ask the contractor to explain how they'll manage:
- Existing damage: What happens if the crew finds rot, wet sheathing, or an out-of-square opening?
- Flashing sequence: Which layers overlap, and how will the sill drain to the exterior?
- Frame support: Where will support blocks and fasteners go for the heavier triple-pane unit?
- Air sealing: What material fills the perimeter gap, and how will the crew avoid frame distortion?
- Final testing: Who checks operation, locks, drainage, exterior sealant, and cleanup?
Look for clear licensing and insurance information, written change-order procedures, manufacturer installation training, and references for comparable Utah homes. A contractor who refuses to discuss flashing or treats installation as a generic window swap isn't giving you enough information to protect the investment.
Superior Home Improvement offers energy-efficient windows and patio doors, including professionally installed triple-pane options, as part of its Utah exterior remodeling services. Homeowners should still compare the proposed specifications, installation scope, warranty terms, and inspection process with other qualified bids.
The strongest contractor is not necessarily the one with the most impressive showroom. It's the one that can explain how the window, wall, flashing, drainage, and interior environment will work together after the crew leaves.
For a Utah-specific assessment, contact Superior Home Improvement about your window openings, glass options, and weather-tight installation plan. Visit Superior Home Improvement to request a consultation and compare a detailed triple-pane window proposal for your home.