
Windows account for about 30% of building heating and cooling energy in the United States, or roughly 4.1 quadrillion BTU of primary energy each year, according to a U.S. Department of Energy window fact sheet. That figure changes how I look at replacement projects. The glass matters, but the frame, rough opening, flashing, insulation, and air seal determine whether an efficient window performs as specified once it's installed in a Utah home.
I've overseen enough Utah window projects to know where homeowners get misled. A premium window can still leak at the perimeter, collect condensation, or operate poorly when the opening is out of square. This guide focuses on the decisions that control the finished result, from ratings and product selection to rough-opening inspection, installation sequencing, verification, maintenance, and the broader exterior envelope. If you're also reviewing roof performance, this resource on best roofing for Colorado homes offers useful context on how roofing choices affect the building envelope in a neighboring mountain climate.
Why Energy Efficient Window Installation Matters for Utah Homes
Utah homes face sharp thermal contrasts. High-elevation communities receive intense sun and ultraviolet exposure, while winter nights create large differences between heated interiors and outdoor air. Older single-pane glass, conductive aluminum frames, failed insulated-glass seals, and loose perimeter joints can turn those conditions into cold rooms, drafts, and uncomfortable radiant surfaces.
That national baseline shifts further in Utah, where elevation and rapid temperature changes place added demands on the window assembly. The DOE's window guidance also notes that raising window R-value from 3 to 5 can reduce average heat loss through windows by 40%. The practical lesson is straightforward: energy efficient window installation must address the complete unit and its connection to the wall, not just the center of the glass.
The ratings that matter
U-factor measures heat transfer through the window assembly. Lower values limit heat flow, which matters during Utah's heating season. Solar Heat Gain Coefficient, or SHGC, describes how much solar energy enters through the window. A south-facing opening may need a different SHGC strategy from a shaded north-facing opening, particularly in homes that overheat during sunny shoulder seasons.
Air Leakage, shown as AL on an NFRC label, indicates how much air passes through a tested unit. Lower leakage is generally preferable, but the label describes the product. It does not confirm that the installer connected the frame to the wall air barrier correctly. Visible Transmittance, or VT, describes daylight transmission and can affect glare and lighting comfort.
Practical rule: Treat the NFRC label as a product specification, not an installation certificate.
What a homeowner should expect
A sound project combines suitable glazing, a thermally competent frame, accurate measurements, a square and dry rough opening, integrated flashing, and a continuous air seal. Superior Home Improvement's workflow should include checking the opening before setting the unit, because an out-of-square opening can leave a capable window difficult to operate and hard to seal consistently.
The right configuration also depends on orientation, shading, existing wall insulation, HVAC condition, and whether the home sits in a cold mountain area, along the Wasatch Front, or in a warmer southern Utah valley. A resource on best roofing for Colorado homes offers useful context on how roofing choices and other exterior assemblies interact in mountain climates.
Energy efficiency is only one result. Correct installation should improve comfort, limit drafts, preserve drainage paths, and keep the sash operating smoothly. Those details mark the point where product performance ends and installer craftsmanship begins.
Choosing the Right Frame, Glazing, and Performance Ratings
Window selection works best when you evaluate the frame and glazing as one assembly. A highly insulated glass package won't compensate for a conductive or distorted frame, and a strong frame won't prevent heat loss through an underperforming glass unit.
| Option | Typical U-Factor | SHGC Range | Utah Climate Fit |
|---|---|---|---|
| Vinyl with double-pane low-E glass | Product-specific | Product-specific | Practical choice for many replacement projects, with low maintenance and good insulation |
| Fiberglass with double- or triple-pane low-E glass | Product-specific | Product-specific | Strong option where dimensional stability and frame strength matter |
| Wood-clad with insulated low-E glass | Product-specific | Product-specific | Useful for appearance-sensitive homes, but exterior maintenance deserves attention |
| Composite with insulated low-E glass | Product-specific | Product-specific | Suitable where the homeowner wants a balance of structural performance and finish options |
| Triple-pane glass with argon or krypton fill | Product-specific | Product-specific | Worth evaluating for exposed, cold, noisy, or comfort-sensitive rooms, subject to price and frame compatibility |
Comparing frame materials
Vinyl is often selected for its insulation, moisture resistance, and low maintenance. Quality matters. Thin, poorly reinforced profiles can perform differently from heavy-duty systems, particularly in large openings exposed to sun and temperature swings.
Fiberglass offers strength and dimensional stability, making it a good candidate for larger units or homeowners focused on long-term frame behavior. It can cost more than basic vinyl, so the decision should reflect opening size, design requirements, and comfort priorities.
Wood-clad windows bring a traditional interior appearance and can suit custom or historic work. The exterior cladding reduces routine exposure, but the assembly still requires careful detailing at the sill, corners, and sealant joints.
Composite frames vary by manufacturer. Ask for the complete NFRC label and warranty terms rather than assuming the word “composite” guarantees a particular thermal result.
Making sense of glazing
Double-pane low-E glass with an insulating gas fill is sufficient for many Utah homes when the frame and installation are sound. Triple-pane glass can make sense in rooms with persistent interior discomfort, large exposed openings, severe winter exposure, or a design where added sound and surface-temperature performance justify the higher cost.
Argon is common in insulated glass. Krypton can support narrower cavity designs, but the manufacturer's complete assembly rating matters more than the gas name alone. Warm-edge spacers can reduce heat transfer at the glass perimeter, where the spacer, seal, frame, and condensation risk interact.
Read the label, then match the orientation
Don't select a window from one rating in isolation. Compare U-factor, SHGC, VT, and AL on the NFRC label, then ask how the proposed product fits the specific wall orientation and shading conditions. ENERGY STAR savings estimates use modeled performance across 132 U.S. cities and the Lawrence Berkeley National Laboratory energy-use and cost model, as documented by the National Fenestration Rating Council's window guidance. Local climate and installation choices change the economics, so the label is a starting point for a room-by-room decision.
Preparing Your Home Before Installation Day
The quality of installation depends partly on what happens before the crew arrives. A clean opening, confirmed product order, and accessible work area let the installer spend time on the building rather than solving avoidable logistics.
Start with the opening and the paperwork
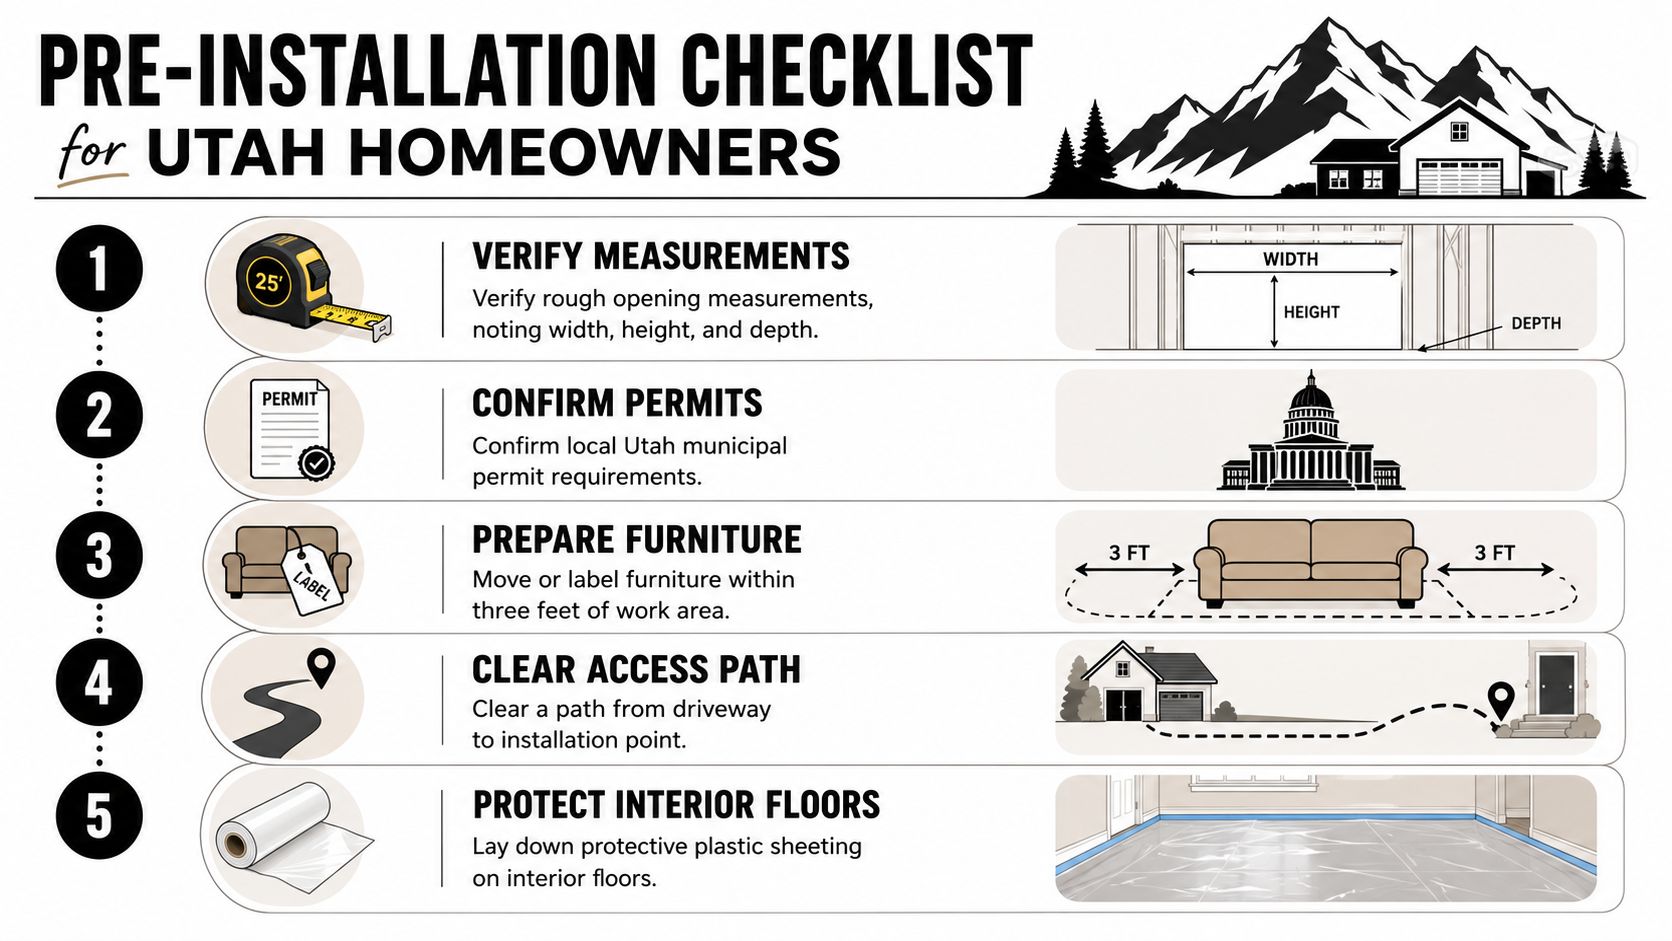
The installer should verify each rough opening's width, height, depth, squareness, sill condition, and framing material. Homeowners shouldn't rely only on an old measurement sheet, especially when units are custom-ordered. Confirm the window style, handing, color, grille pattern, glass package, and quantity against the contract before delivery.
Permit requirements vary by Utah municipality. Replacement work may also face additional review in historic districts or when an opening changes size, egress, or safety-glazing conditions. Ask the contractor who handles permits and request the permit number or inspection process when applicable.
Ordering one spare unit isn't always practical for a custom project, but it can be worth discussing for unusual sizes or discontinued product lines. At minimum, preserve the exact manufacturer, series, dimensions, and label information for future repairs.
Protect the interior and exterior
Clear curtains, blinds, furniture, wall art, and valuables from each opening. Label anything that can't be moved, and create a protected path from the driveway or staging area to the work zone. Remove fragile items from nearby shelves because vibration and dust travel farther than expected.
Outside, trim branches and landscaping that block ladders or access to the sill. Tell the crew about irrigation lines, security sensors, exterior lighting, and recently painted surfaces. Arrange for children and pets to stay away from the opening, tools, glass, and debris.
Use the pre-install walkthrough
Before removal begins, the lead installer should confirm the product at each location, review interior protection, inspect exterior access, and discuss any visible structural concern. This is the point to identify rot, damaged sheathing, unusual trim, masonry transitions, or an opening that differs from the original scope.
Don't approve hidden repair work verbally and move on. Ask for the condition, the proposed correction, the cost impact if any, and how the repair will affect flashing and the finished trim.
What Happens During a Professional Window Installation
A disciplined installation day follows a repeatable sequence, but the crew still has to respond to the actual building. At Superior Home Improvement, the process begins with a short pre-job walkthrough. The lead installer confirms measurements, window locations, interior drop cloths, floor protection, and exterior access before the first unit comes out.
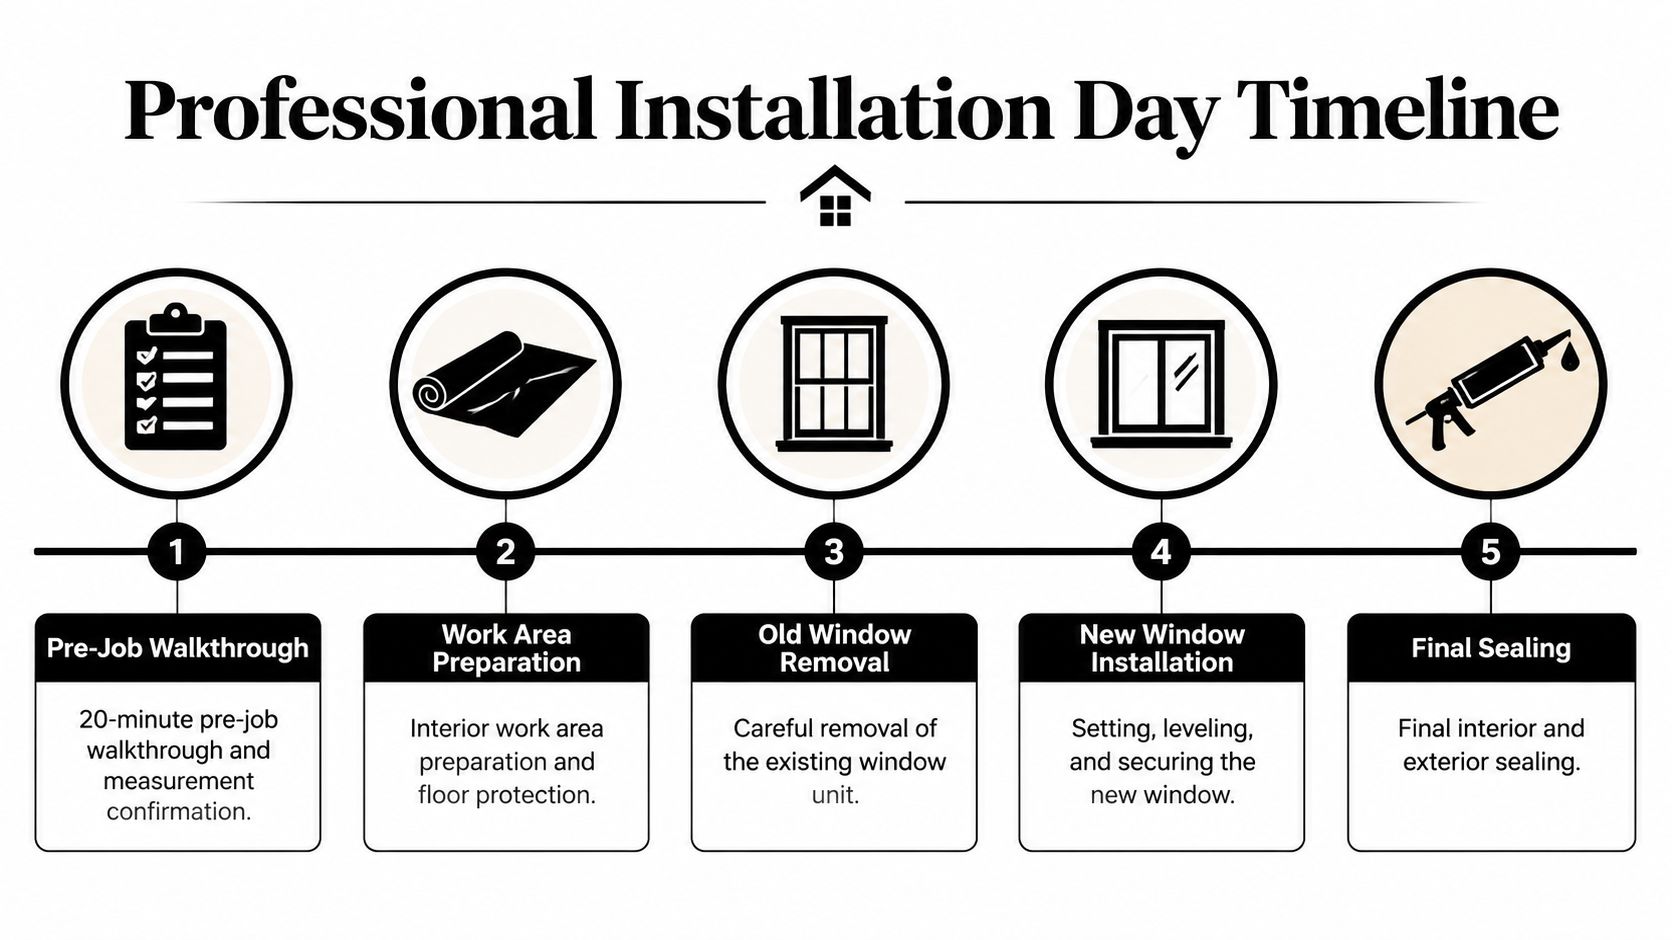
The crew removes old units one at a time rather than opening the entire house at once. That keeps the home more secure and limits exposure to weather. After removal, the installer checks the sill, jambs, head, framing, sheathing, and drainage conditions. Rot or an out-of-square opening has to be corrected before the new unit can be expected to sit correctly.
Setting the frame correctly
The sill must sit level and supported. Installers use shims at planned structural points, then check the jambs for plumb and the frame for equal diagonal measurements. A small error can show up later as a sash that drags, a lock that won't engage, or an uneven perimeter gap.
The new frame is fastened without distorting the profile. Overdriven fasteners can pull a jamb inward, while insufficient support can allow movement. The crew then installs the sash and glazing components, checks operation, and confirms that the locks, balances, screens, and drainage paths work as intended.
Integrating flashing and sealant
At the exterior, flashing must connect the window to the wall's water-management system. Flashing tape is typically lapped in a shingle-style sequence so water moves outward rather than behind the lower layers. A self-adhered sill membrane or pan flashing protects the most vulnerable horizontal surface.
Interior and exterior sealant complete the opening. The correct sealant, joint size, backer material, and substrate preparation matter more than applying a thick, messy bead. Trim hides the transition, but it shouldn't hide an incomplete air or water seal.
The finished window should open, lock, drain, and seal before the crew moves to the next opening.
A final walkthrough gives the homeowner a chance to inspect the sash operation, trim, caulk continuity, screens, and cleanup. Some crews leave levels or other simple verification tools available at the sill so the homeowner can review the installation. Debris removal and the condition of floors, walls, landscaping, and exterior trim should be part of the sign-off, not an afterthought.
A short visual overview of the sequence is also available in this professional window installation video.
Air Sealing, Insulation, and Post-Install Verification
The space between the window frame and the rough opening is where many installations succeed or fail. The glass controls heat transfer through the center of the unit, but an unsealed perimeter lets moving air bypass that performance.
DOE guidance warns that even high-performance windows can create drafts and condensation when installers don't address the rough opening, flashing, and perimeter air seal. The same DOE guide to energy-efficient windows describes the practical sequence of measuring, removing, leveling, insulating, flashing, and sealing. It also warns against using fibrous insulation at the window-wall interface because fiberglass is air-permeable.
Build the seal without distorting the frame
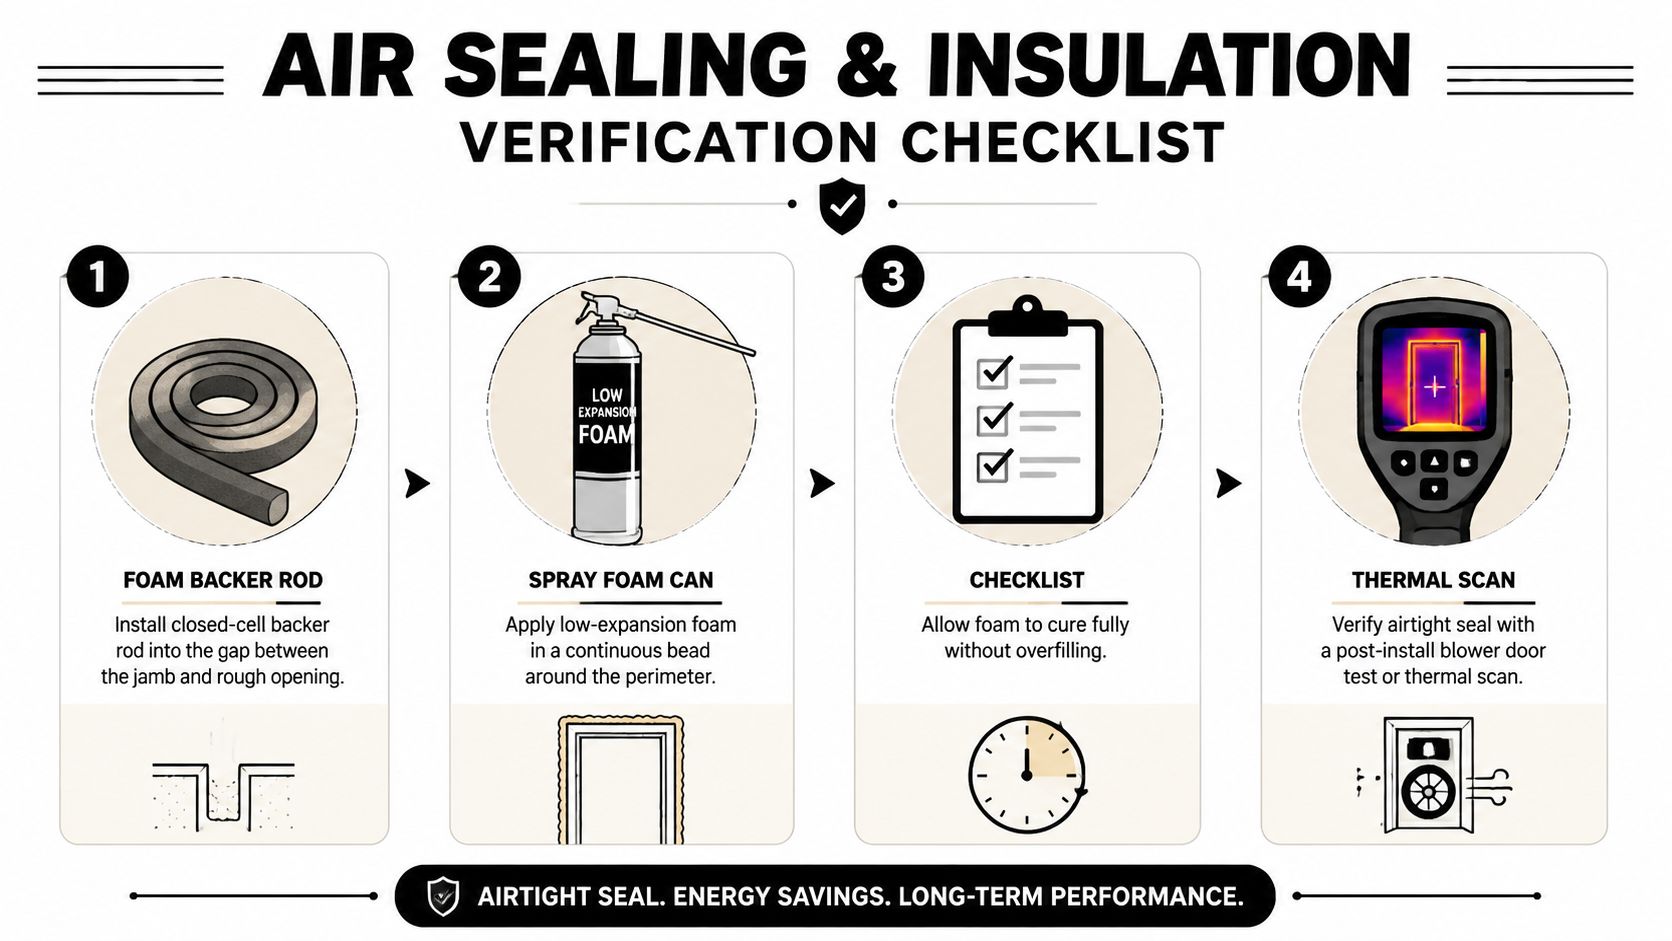
A careful crew fills the joint with a compatible low-expansion window foam or an appropriate sealant and backer-rod assembly. High-expansion foam can bow the jamb and interfere with sash operation, so installers should use a product intended for windows and doors and apply it in a controlled amount.
Backer rod controls joint depth and gives sealant a stable surface. The interior air seal should connect continuously to the room-side air barrier, while the exterior seal and flashing should shed water without trapping it. Sill drainage and weep paths must remain open.
Verify instead of assuming
Post-installation checks can include localized leakage testing, infrared scanning, or a blower-door test when the project scope and code requirements support it. Lawrence Berkeley National Laboratory field data found that 40% of newly installed windows tested had air leakage above the 0.50 cfm/lfc standard, while 60% exceeded manufacturer specifications, according to the DOE window installation guide. Those results explain why a good product label isn't enough.
An ORNL analysis using ASTM E779 blower-door testing found an average 6.1% reduction in air infiltration after window-related interventions, with observed improvements ranging from 0.5% to 19.3% and no significant correlation to the tested building or window characteristics, as reported in the ORNL field analysis. The outcome varies because whole-building leakage rarely comes from windows alone.
During the first day, operate every sash, lock, and screen. Look for a gap in the caulk line, a shim that has shifted, visible foam where it shouldn't be, water at the sill after controlled testing, or a sash that rubs. In cold weather, monitor interior glass and perimeter condensation, but don't confuse normal temporary humidity changes with a failed seal without checking the conditions.
Costs, ROI, and the Case for Hiring a Certified Installer
A responsible window quote separates the unit from the work required to install it. The price can change substantially when a retrofit insert becomes a full-frame tear-out, when the crew finds structural damage, or when a window near stairs or another hazardous location requires safety glazing. Utah homeowners should request those assumptions in writing before comparing bids.
The verified ENERGY STAR guidance says replacing single-pane windows with certified models can lower household energy bills by up to 13% nationwide, while DOE guidance estimates annual savings of about 7% to 15%, or approximately $71 to $501 per year, depending on location and the type of window replaced. The ENERGY STAR replacement-window guidance makes clear that modeled savings vary by climate and product choice.
| Window Package | Installed Cost per Window | Avg. Annual Savings | Payback Period |
|---|---|---|---|
| Standard certified vinyl replacement | Quote-specific | Home-specific | Calculate from the verified project quote and modeled savings |
| Premium vinyl with upgraded low-E package | Quote-specific | Home-specific | Calculate from the verified project quote and modeled savings |
| Fiberglass with insulated low-E glass | Quote-specific | Home-specific | Calculate from the verified project quote and modeled savings |
| Triple-pane package | Quote-specific | Home-specific | Calculate from the verified project quote and modeled savings |
Why the lowest bid can cost more
A DIY installation can work for an experienced builder with the right tools and a suitable opening. It becomes risky when the project involves unknown framing, upper-story access, integrated flashing, interior finish work, or warranty conditions that require documented installation practices.
A certified installer brings capabilities that a product purchase doesn't provide:
- Opening correction: The crew can identify rot, movement, and out-of-square framing before the defect gets buried.
- Flashing integration: The installer connects the window to the WRB and sill drainage rather than relying on exposed caulk alone.
- Verification: A blower-door or localized leakage check can reveal defects that aren't visible after trim is installed.
- Jobsite liability: Professional coverage addresses damage or injury risks that homeowners otherwise carry themselves.
- Documentation: Product labels, serial numbers, installation records, and warranty requirements stay together.
For homeowners planning a broader efficiency project, this guide to how to reduce home electricity bill can help place window upgrades alongside lighting, HVAC, insulation, and usage decisions. Windows are one part of the envelope, not a substitute for every other efficiency measure.
Long-Term Maintenance, Warranty, and Utah Climate Care
A window installation needs routine observation, not constant attention. Utah's strong sun, dry dust, hard-water residue, winter ice, and freeze-thaw movement can stress exterior finishes and sealants over time.
Use a simple care calendar
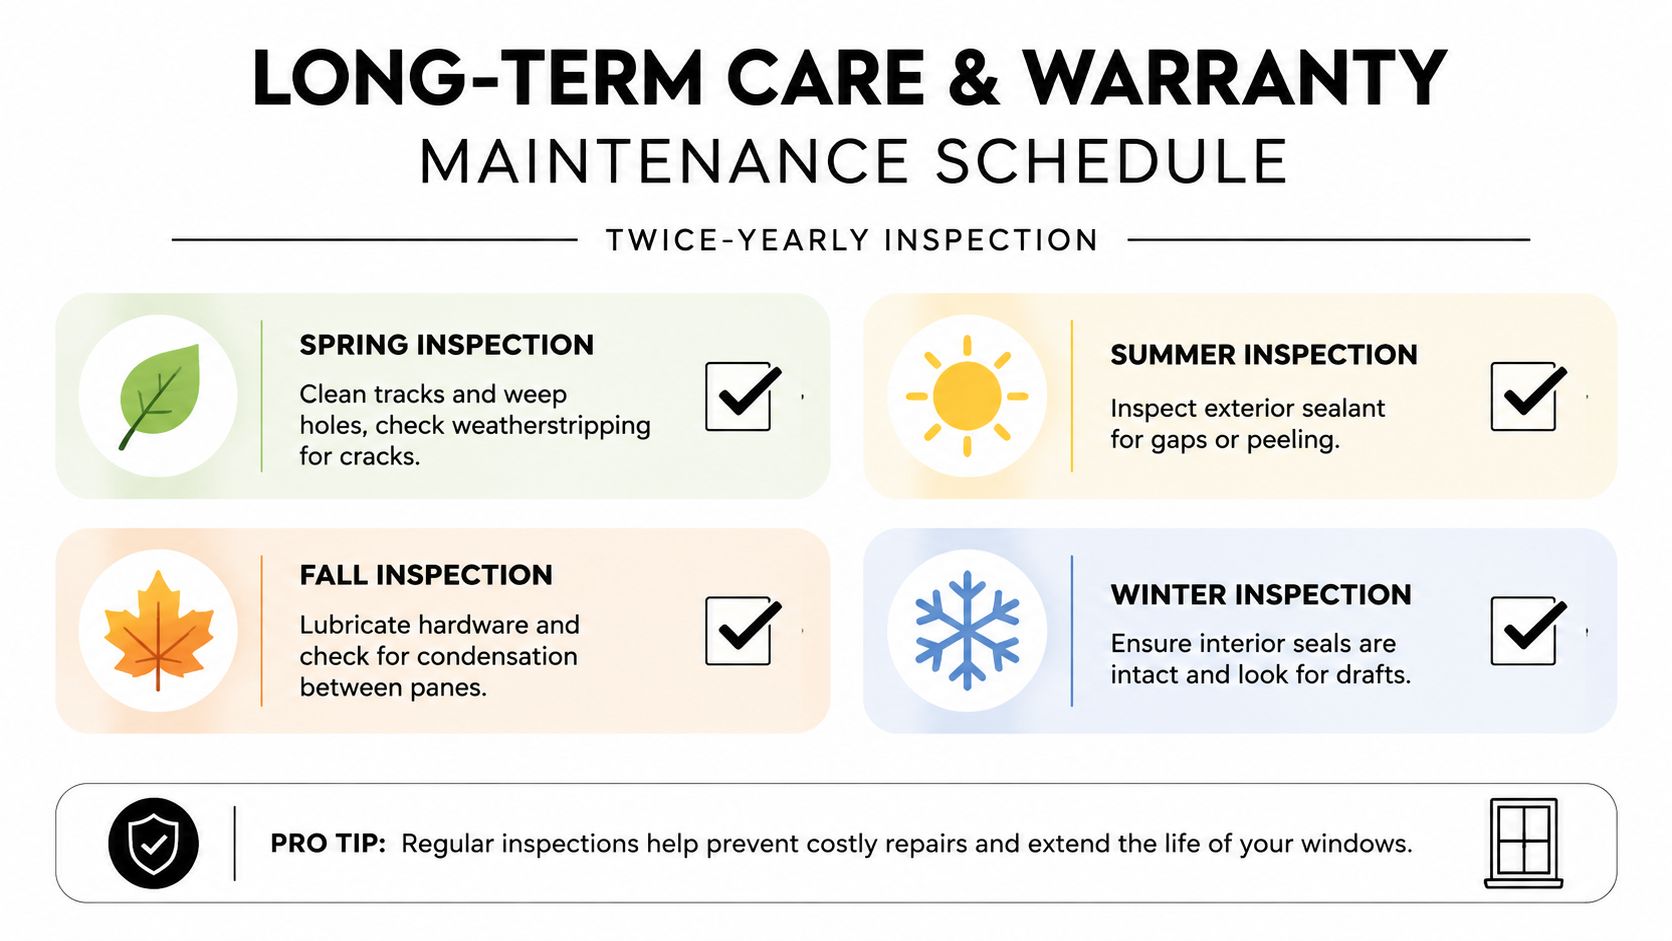
Spring: Clean tracks, sills, screens, and weep holes. Check weatherstripping for cracks or compression, and remove winter debris before it blocks drainage.
Summer: Inspect exterior caulk for gaps, peeling, or separation. Wash mineral deposits with a manufacturer-approved cleaner and a soft cloth. Avoid abrasive pads and don't apply aftermarket tint film without confirming compatibility with the insulated glass warranty.
Fall: Lubricate hardware with the product-approved lubricant. Check for condensation between panes, which can indicate an insulated-glass seal problem, and confirm that locks engage without forcing the sash.
Winter: Look for drafts at the interior perimeter and inspect seals after the first cold weather. Keep snow and ice from pressing against drainage paths. Don't use pressure washing around window joints.
Keep warranty records complete
The manufacturer's warranty covers the product, while the installer's labor warranty covers workmanship according to its written terms. Transferability, claim deadlines, exclusions, and required maintenance vary, so keep the handover packet with serial numbers, NFRC labels, care instructions, contract documents, and photographs of the completed work.
Report defects through the proper channel within the stated period. Third-party modifications, pressure washing damage, unapproved films, and alterations to the frame or flashing can affect coverage. If a problem appears, document the location, weather conditions, photographs, and operating symptoms before attempting a repair.
The most useful maintenance habit is a spring and fall inspection recorded on one page. That small record creates a service history, catches sealant problems before water enters the wall, and gives the installer or manufacturer the information needed to evaluate a claim.
Superior Home Improvement provides energy-efficient window replacement, new window installation, custom designs, patio doors, and ENERGY STAR certified options with a Utah-focused installation workflow. Visit Superior Home Improvement to schedule a consultation, review whole-window choices, and request a detailed installation proposal for your home.