
Weather stripping is a compressible seal installed on movable window and door joints to close gaps and reduce air leakage. Its energy impact is typically modest on its own, but it becomes meaningful as one layer in a broader building-envelope strategy.
You notice the problem on a cold morning in Heber City or the Salt Lake Valley. Frost gathers along a sill, a back door feels cold around its edges, and the furnace runs while one room still feels uncomfortable. The instinct is often to blame the window, but the actual leak may be the narrow joint where the moving sash meets the frame.
Weather stripping targets that joint. It helps keep conditioned air inside, limits drafts and wind-driven moisture, and supports the performance of insulation and heating equipment. It won't turn an old single-pane window into a modern high-performance unit, but it can close one of the simplest and most persistent paths for uncontrolled air movement.
What Weather Stripping Actually Does
At a window or door, the moving parts must open and close. That movement creates a joint between the sash or door slab and the stationary frame. Even a narrow irregular gap can allow outdoor air to enter and indoor air to escape.
Weather stripping is a compressible sealing material applied to those movable joints. When the window sash or door closes, the material presses against the opposite surface and fills the gap without preventing normal operation. This dynamic compression is the core of what weather stripping does, as described in installation guidance from building weatherization resources.
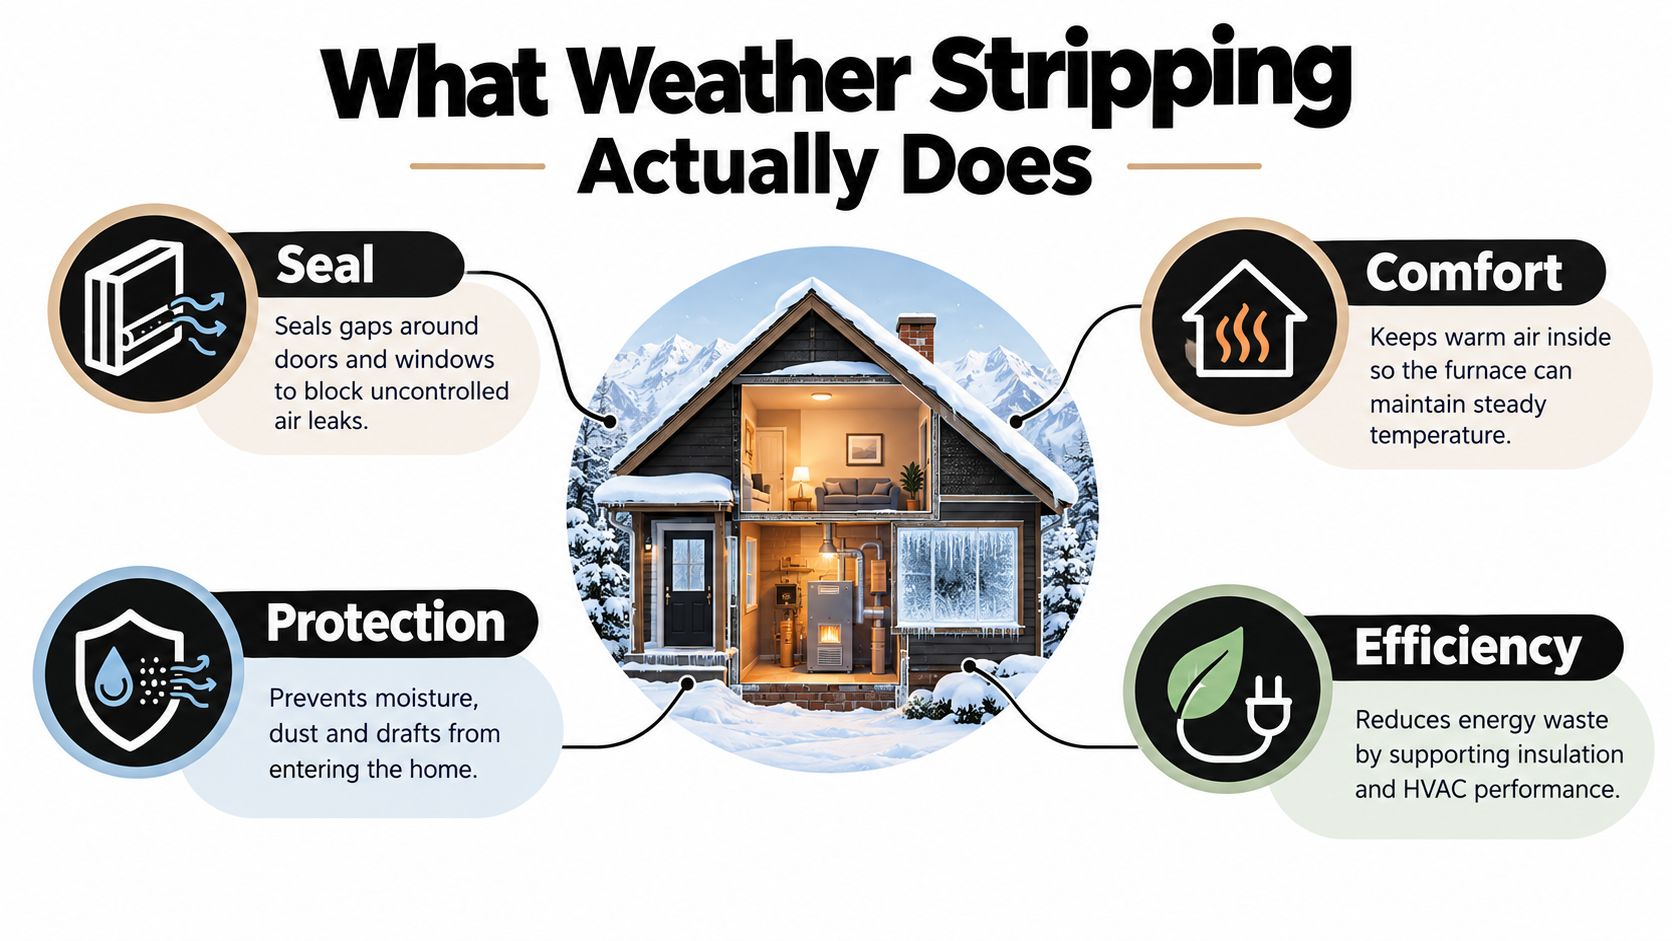
The seal works at the moving joint
Think of the strip as a flexible gasket, not a miniature wall. It doesn't add much insulation value by itself. Instead, it blocks uncontrolled infiltration, outdoor air coming in, and exfiltration, indoor air leaking out.
That distinction helps separate weather stripping from two other materials:
- Caulk seals fixed joints. It belongs around stationary frame-to-wall connections and other cracks that aren't meant to move.
- Insulation slows conductive heat transfer. It works inside walls, ceilings, floors, and other assemblies.
- Weather stripping seals operable components. It must remain flexible enough for repeated opening and closing.
The material can also reduce the path for moisture, dust, and cold air reaching interior surfaces. That doesn't make it a substitute for drainage details, flashing, or proper window installation, but it can reduce exposure at a leaky interface.
Why the savings are usually limited
Independent preservation research found that window retrofits using weather stripping can produce measurable energy savings, but the results were generally modest. One analysis reported less than 5% energy savings across climate regions, with simulated savings as low as 1% to 3% in the cities studied (National Trust for Historic Preservation and Preservation Green Lab analysis).
That result isn't a reason to ignore a damaged seal. Draft reduction can improve comfort immediately, and several small envelope repairs can work together. It is a reason to treat weather stripping as a targeted repair, not as a promise that one roll of material will solve the home's entire energy problem.
For a broader explanation of the relationship between seals, drafts, and window performance, how window seals affect energy efficiency offers useful background.
Common Types and Materials Compared
The right weather stripping depends on where the gap is, how large it is, how often the opening moves, and how much sun and moisture it sees. A narrow window channel needs a different profile from the bottom of an exterior door.
Modern construction and weatherization documents identify materials including neoprene, polypropylene, vinyl, thermoplastic elastomer, silicone, aluminum carriers, and EPDM. That range matters in Utah, where ultraviolet exposure, freezing temperatures, and repeated seasonal movement can punish low-grade adhesive products.
Match the profile to the opening
V-strip, also called tension seal, folds into a V and compresses inside a window channel or along a door jamb. It can work well on double-hung window meeting rails and side channels when the gap is small and reasonably consistent.
Adhesive-backed foam tape is easy to cut and apply. It suits irregular, low-use gaps, but compression and adhesive failure can become problems on a busy exterior door or a sunny window.
Felt remains a budget option for low-traffic locations. It has limited resistance to moisture and friction, so it usually makes more sense as a temporary or light-duty repair than as a long-term exterior solution.
Door sweeps and thresholds handle the bottom edge of a slab door. A sweep mounts to the door, while a threshold forms the opposing surface. This area deserves careful adjustment because a seal that's too low can drag, while one that's too high leaves a draft path.
Silicone and EPDM kerf-in seals fit into a routed groove, or kerf, in the frame. They're common in modern construction because the seal is mechanically retained rather than relying only on adhesive. Tubular gaskets use a compressible bulb and work well around a tight-fitting exterior door.
Weather stripping types at a glance
| Type | Best Gap Size | Best Location | Typical Lifespan | Cost Tier |
|---|---|---|---|---|
| V-strip or tension seal | Small, consistent gaps | Window side channels, meeting rails, door jambs | Moderate to long when protected | Low to medium |
| Adhesive-backed foam tape | Small to irregular gaps | Window edges, light-use doors | Short to moderate | Low |
| Felt | Small gaps with light movement | Interior-facing or low-traffic joints | Short | Low |
| Door sweep | Bottom gap at a door | Exterior door slab and threshold | Moderate to long, depending on traffic | Low to medium |
| Silicone or EPDM kerf-in seal | Small, controlled compression gaps | Modern window and door frames | Long | Medium to high |
| Tubular gasket | Small to moderate perimeter gaps | Exterior door jambs and head | Long | Medium to high |
These lifespan descriptions are practical comparisons, not guarantees. Sun exposure, surface preparation, door alignment, cleaning, and traffic all affect service life. A premium material installed on a dirty or misaligned frame can perform worse than a simpler product installed correctly.
Practical rule: Choose the seal that matches the gap and movement first. The most expensive material isn't automatically the best repair.
Energy Savings and Storm Resistance Benefits
Weather stripping saves energy by reducing unwanted air movement, not by transforming the thermal properties of the window or door. That makes it a useful low-cost envelope layer, especially where a visible draft comes from an operable joint.
Federal building findings report that manual air sealing with spray foam and weather stripping can improve airtightness by 6% to 17% (GSA building-envelope findings). The result applies to combined air-sealing work, so it shouldn't be interpreted as the expected performance of a single strip installed on one window.
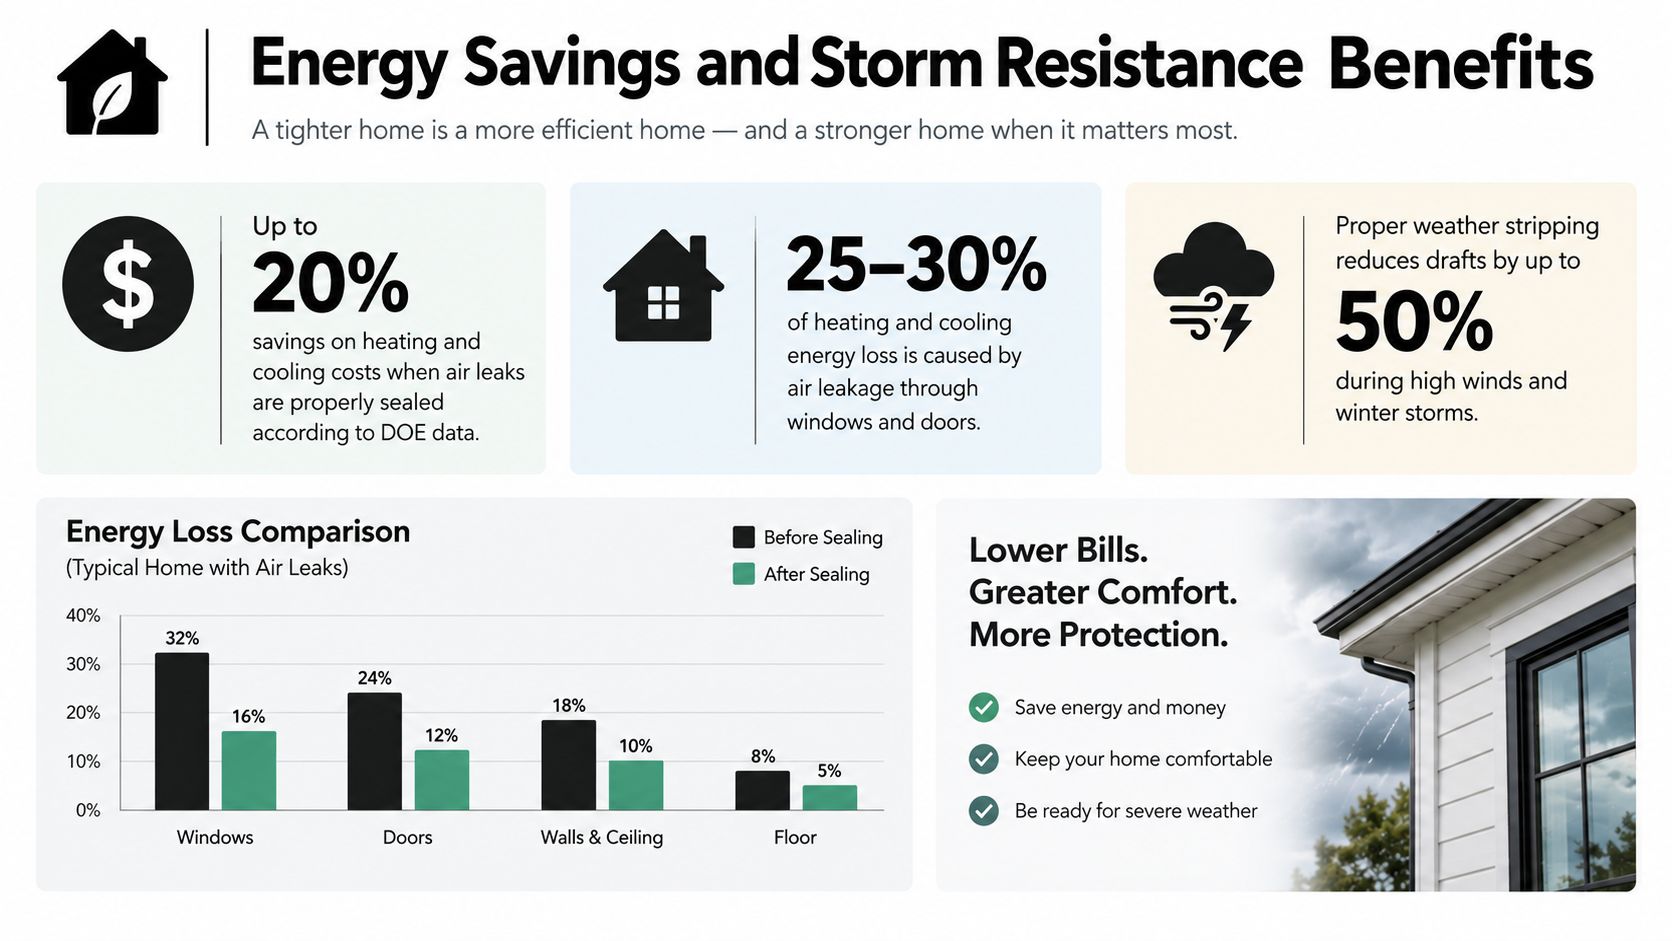
Comfort comes before the utility bill
A leaky sash can create a cold stream that crosses the room even when the thermostat reports the correct temperature. Sealing that path can make the space feel steadier, reduce cold surfaces near the opening, and help the furnace distribute comfort more evenly.
The field evidence also shows why expectations should remain realistic. A NYSERDA and Taitem evaluation found that plastic V-strips reduced air infiltration by 5% to 13% across six houses, averaging 9.2%, with savings-to-investment ratios from 1.2 to 2.3. The same evaluation found that performance declined as gap size increased and recommended V-strips mainly for gaps between 0.07 inches and 0.12 inches (PacifiCorp evaluation report).
Wind and moisture protection
A tight perimeter also helps during Wasatch wind events. It can limit dust and wind-driven moisture entering through a door edge, reduce whistling, and keep cold outdoor air away from interior trim and glass edges.
Climate still matters. GSA findings reported that leaky buildings in cold climates experienced the largest HVAC savings from automated envelope sealing, while mixed-mild climates saw much smaller savings, below 0.8 kWh per square foot in the cited locations (GSA findings). Utah's cold winter conditions make leakage worth investigating, but the right repair may involve frame sealing, insulation, ductwork, or window replacement rather than weather stripping alone.
Signs It Is Time to Replace Weather Stripping
A Park City homeowner notices the issue on a January morning. Cold air pools near the back door, and a faint whistle comes from the kitchen window when the wind rises. The seal may be worn, but the inspection should identify the exact failure before anyone buys replacement material.
Start with three simple checks
- Use a candle or incense stick carefully. With the window or door closed, hold the smoke or flame near the perimeter. A sideways trail or bending flame indicates moving air. Keep any flame away from curtains, finishes, and combustible materials.
- Look for daylight. Visible light at a closed jamb, sill, or meeting rail means the surfaces aren't making continuous contact. Daylight at the bottom of a door often points to a sweep or threshold problem.
- Examine the material. Flattened foam, cracked rubber, peeling adhesive, torn felt, or missing sections all indicate that the seal can no longer maintain consistent compression.
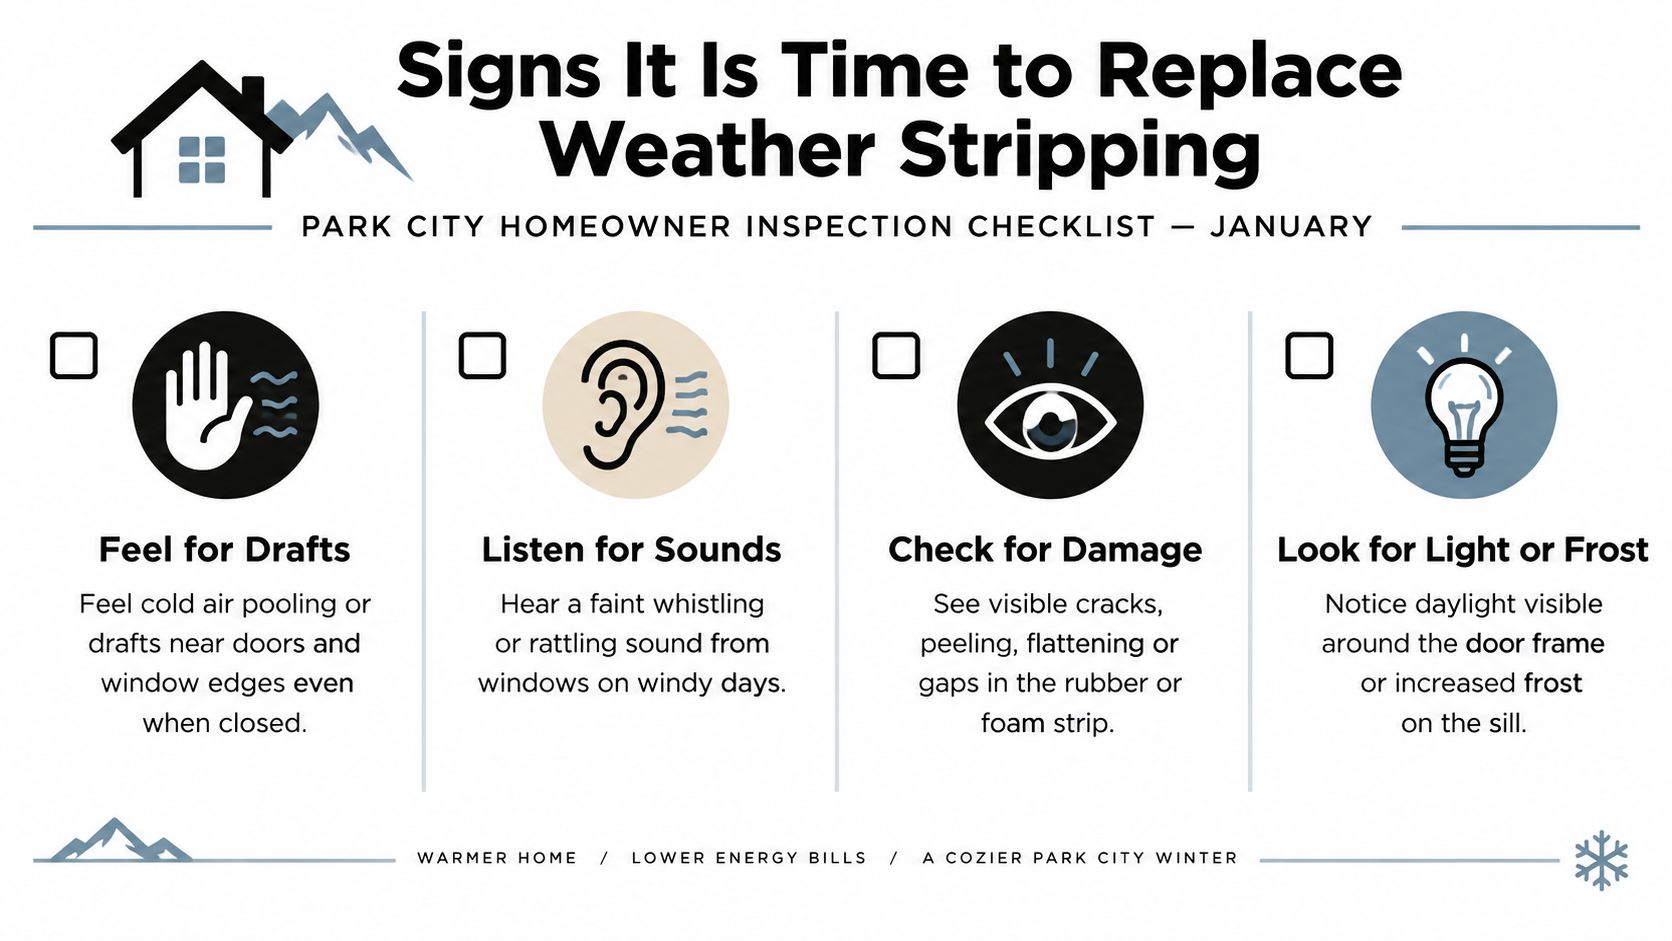
Don't confuse a bad seal with a bad fit
Brittle or gummy EPDM, water staining on interior trim near the joint, and unusual winter condensation around the edge of the glass can all justify closer inspection. They may reflect failed weather stripping, but they can also signal drainage, installation, humidity, or glazing problems.
Door alignment deserves special attention. If the slab has sagged, the latch doesn't engage cleanly, or the hinges have loosened, replacing good weather stripping won't correct the uneven pressure. Close the door slowly and check whether the gap stays consistent around the perimeter. A professional can distinguish seal failure from sash tilt, hinge movement, or hardware trouble before you spend money on the wrong repair.
DIY Replacement Versus Professional Installation
DIY replacement makes sense when the joint is accessible, the gap is visible, and the opening still operates normally. The job is less about force than about matching the profile, preparing the surface, and achieving light, even compression.
A practical DIY sequence
- Identify the joint. Decide whether you're sealing a sash edge, jamb, meeting rail, or door bottom.
- Measure the gap. Check several points because an old frame may not be uniform.
- Select the profile. Use foam tape or V-strip for straightforward light-duty repairs, and use a compatible kerf-in gasket or sweep where the frame was designed for one.
- Clean the surface. Remove old adhesive, dirt, and loose material. The surface must be clean and dry, and installation guidance recommends working above 20°F (weatherization installation guidance).
- Cut and install carefully. A tape measure, utility knife, screwdriver, and, where appropriate, a hairdryer for gently softening adhesive are usually enough for basic work. Don't stretch the strip during installation.
- Test the operation. The door or window should close fully, latch normally, and compress the seal without excessive resistance.
The most common DIY mistake is installing too much material. A seal that makes the door difficult to close can deform the frame, damage the adhesive, or encourage the homeowner to leave the opening unlatched.
When professional work earns its place
A professional can assess leakage, replace a routed kerf-in seal, adjust a sash, correct a door sweep, and determine whether the frame or hardware is the actual problem. The decision becomes more important when several openings leak, the units are difficult to operate, or moisture has damaged the surrounding trim.
| Factor | DIY Replacement | Professional Installation |
|---|---|---|
| Best fit | One accessible, clearly worn seal | Multiple openings or uncertain failure source |
| Main tools | Tape measure, knife, screwdriver, cleaning supplies | Diagnostic equipment plus installation tools |
| Main advantage | Direct control over a simple repair | Correct profile selection and diagnosis |
| Main risk | Poor fit, excess compression, adhesive failure | Higher project cost |
| Escalation point | Persistent draft after replacement | Frame damage, hardware failure, or aging unit |
For a garage door bottom seal or perimeter, a dedicated install garage weather stripping guide can help you identify the different components before starting. A garage door has moving panels and a floor contact condition that differ from a standard entry door, so don't assume one product fits both.
Weather Stripping for Utah Homes and the Energy Conservation Program
Utah homes face a demanding combination of cold winters, intense summer sun, and repeated temperature movement. A seal that remains flexible and attached through that cycle matters more than one selected only for its low shelf price.
Treat sealing as the first inspection layer
During a home performance review, an inspector should look at operable windows and doors before recommending a major replacement. The sequence is practical:
- Check the moving joints. Identify missing, compressed, or damaged weather stripping.
- Inspect fixed connections. Look for frame-to-wall gaps that need caulk or another stationary seal.
- Review insulation paths. Examine attics, walls, floors, and other areas where conductive heat loss may dominate.
- Assess the equipment and assembly. Confirm whether the HVAC system, glass, frame, or hardware limits the benefit of a seal repair.
This order prevents a new window or additional insulation from masking a simple air leak that should have been addressed first. It also avoids treating every draft as evidence that the full window unit has failed.
Build the envelope in layers
Weather stripping fits beneath larger measures such as high-performance windows, insulation improvements, and UV-resistant exterior materials. The combined approach matters because a tight window still underperforms if the surrounding frame leaks, and insulation can't stop a direct draft through a door perimeter.
A randomized residential efficiency study of more than 30,000 eligible households found that combined upgrades, including weather stripping, reduced household energy use by 10% to 20% on average, although those results represented only 39% of modeled savings (NYCHA construction and weatherstripping standards). The finding reinforces a useful Utah lesson: weather stripping contributes to a system, but it isn't a substitute for the system.
Superior Home Improvement's Energy Conservation Program presents weather stripping as an entry point alongside insulation strategies, high-performance windows, patio doors, roofing, and siding. If you use that route, ask for a written scope showing which leaks will be sealed, which materials will be installed, and which larger upgrades are justified by the home's condition.
Your Next Steps Toward a Tighter Home
Weather stripping is often the most accessible first repair because it targets a visible, movable joint without replacing the entire assembly. Its value is strongest when you use it to start a measured plan rather than treating it as the finish line.
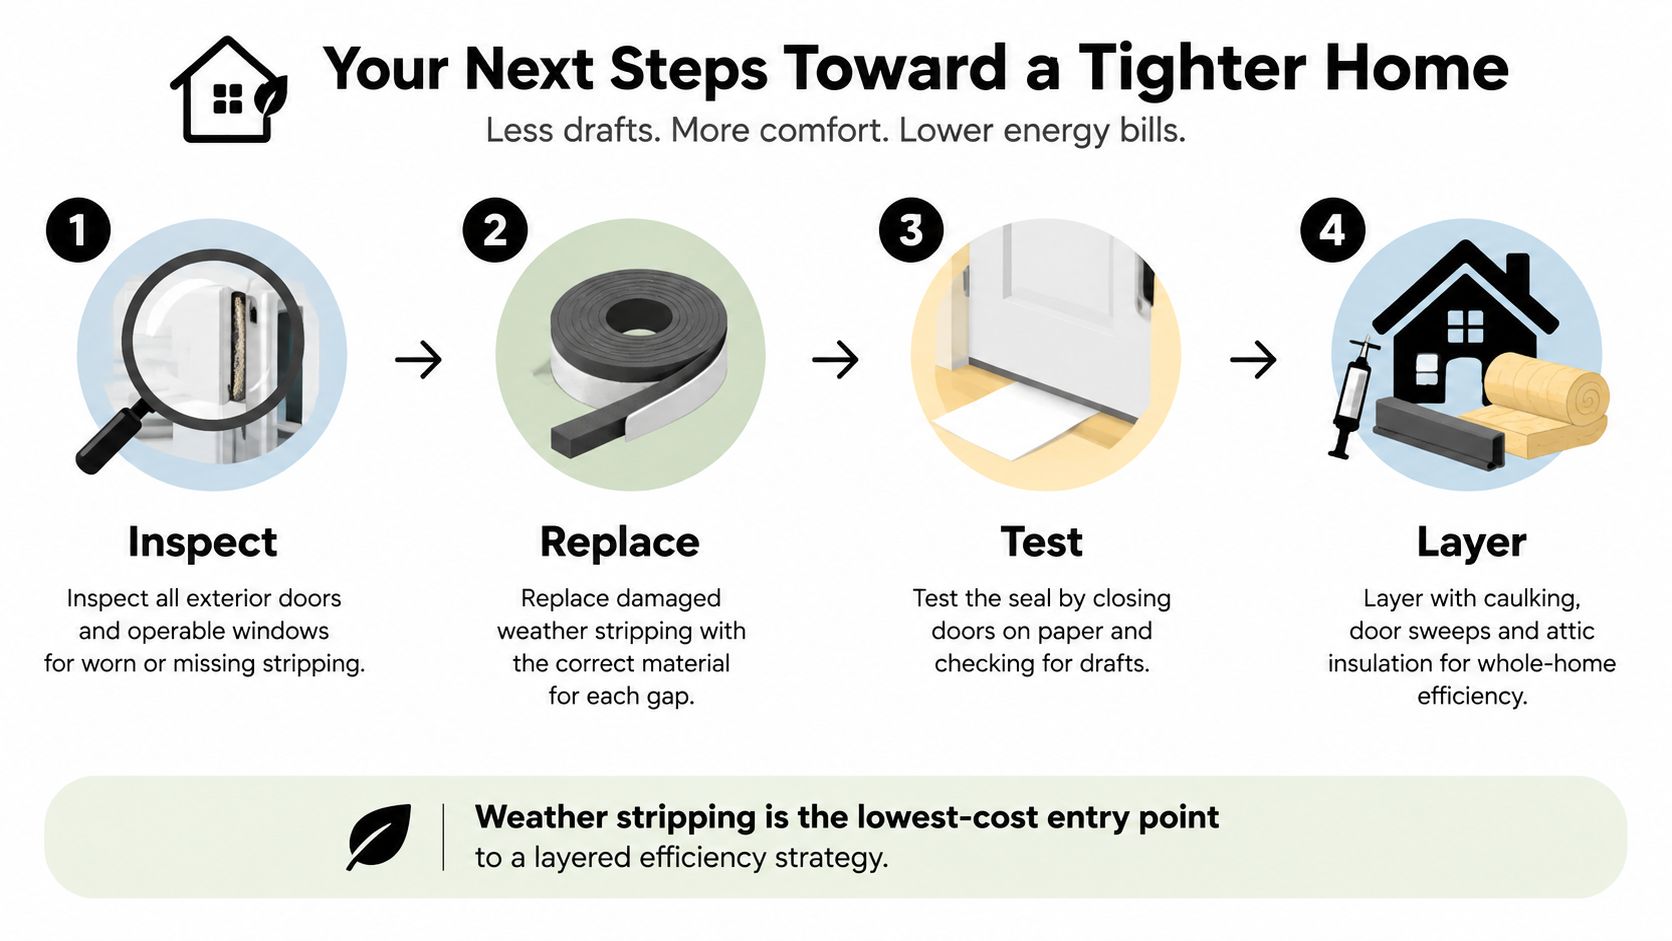
Use this weekend checklist
- Inspect every exterior opening. Check door perimeters, thresholds, operable windows, meeting rails, and sills for daylight, drafts, and visible wear.
- Measure before buying. Record the gap at several points so you can choose a profile that compresses without restricting movement.
- Replace simple failures. Use the correct foam, V-strip, sweep, gasket, or other profile for the location and exposure.
- Test the result. Close the opening on a sheet of paper, repeat the draft check, and confirm that the latch and sash still operate normally.
- Add the next layer. If drafts remain, investigate caulking, frame sealing, insulation, duct leakage, and glazing rather than adding thicker weather stripping blindly.
A professional audit makes sense when several rooms remain uncomfortable, the openings are old or difficult to operate, or a replacement decision is under consideration. A qualified evaluator can separate a seal problem from a frame, hardware, glass, insulation, or HVAC problem.
Utah homeowners can also use the Energy Conservation Program as a way to organize the work into stages. Start with inspection and air sealing, then consider insulation and high-performance window or door upgrades where the evidence supports them. That layered approach gives each improvement a clear job and avoids paying for a large replacement to solve a small perimeter leak.
Superior Home Improvement can evaluate weather stripping alongside window, patio-door, insulation, roofing, and siding improvements as part of a broader Utah home-efficiency plan. Visit Superior Home Improvement to request a consultation and discuss which air-sealing steps should come first in your home.