
You're probably standing in front of an open closet, tape measure in hand, thinking the hard part is picking the doors. It isn't. The hard part is getting the bypass door rough opening right before the doors, track, jambs, and flooring all start fighting each other.
When the opening is wrong, bypass doors tell on you fast. They scrape the floor, drift out of alignment, leave uneven margins, or refuse to overlap the way they should. Most of the time, the problem started long before the doors went in. It started when someone trusted a generic formula without checking the actual hardware package.
That's the part most online guides miss. A bypass setup isn't just two slabs in a hole. It's a system. The track style, roller type, undercut, jamb detail, overlap, and finished floor all affect what the rough opening should be. If you frame first and verify later, you can back yourself into a bad install.
Framing a Perfect Fit for Your Bypass Doors
A clean bypass installation starts with one decision. You frame for the specific door system you're installing, not for a rule you found on a random forum. That sounds obvious, but it's where a lot of DIY projects go sideways.
In the field, the rough opening has to do three jobs at once. It has to leave room for the hardware, give you enough adjustment to get the jambs straight, and keep the slabs moving without dragging on the finished floor. Miss any one of those, and the install becomes a patch job.
Three problems show up over and over:
- Too tight: The track or jamb detail won't fit cleanly.
- Too loose: The overlap is wrong and the doors don't close the way they should.
- Too short: Flooring goes in later and the slabs start rubbing.
Practical rule: Measure the opening, choose the exact hardware, then frame to the manufacturer's instructions. That order matters.
A lot of homeowners assume bypass doors are forgiving because they slide instead of swing. They aren't. They'll tolerate a little adjustment in the hardware, but they won't forgive a bad opening. If you want the doors to look deliberate and glide the way they should, precision isn't optional.
Why Generic Formulas Fail Most DIY Projects
The internet loves a simple formula. For bypass doors, the usual advice is some version of “add this much to height” or “subtract this much from width,” then call it done. That works only when the hardware matches the assumptions behind the formula.
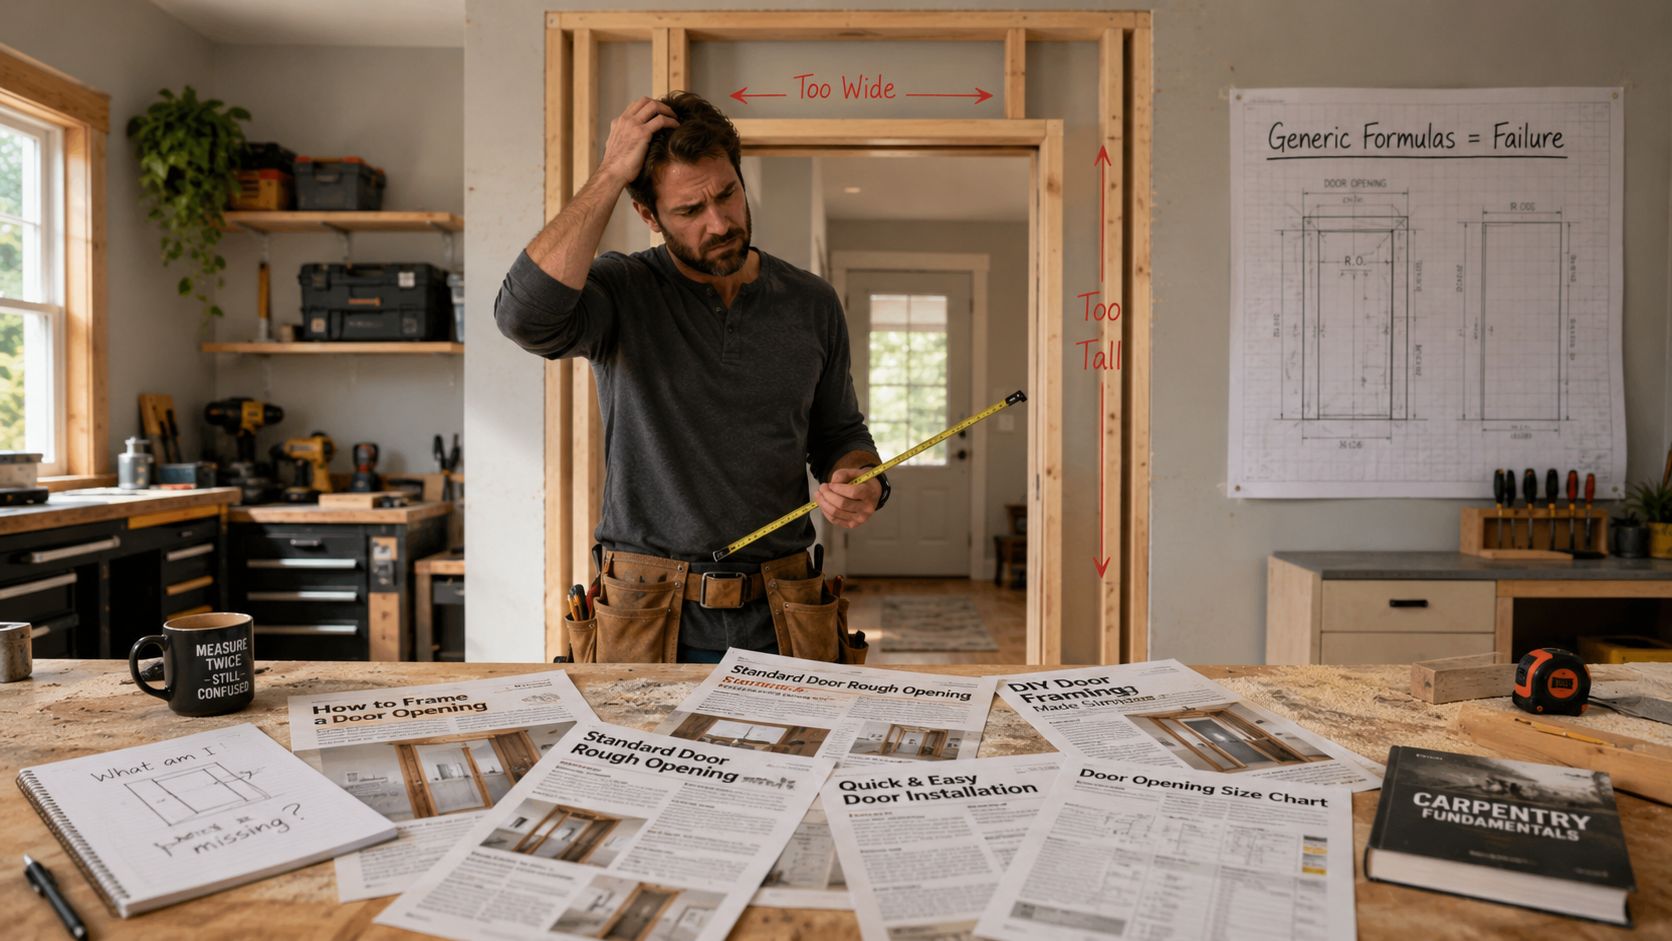
A key consideration is that different kits need different clearances. A hardware-specific review of common installation mistakes notes that general guides often push a fixed add-on, but actual manufacturer requirements can vary. Width can range from equal to the door call-out width to +1 inch, and height can vary from +3 to +3.5 inches depending on the hardware according to this breakdown of common door installation mistakes.
What changes from one system to another
One bypass package might use top rollers with one style of track. Another might use a different guide arrangement, a different undercut, or require more vertical room for the header area and top hardware. The slabs may look similar on the showroom floor, but the install tolerances aren't always the same.
That means this rough opening question is really a hardware question first. Before you frame, you need answers to these:
- What track system are you using
- Does it ride from the top, the bottom, or both
- What undercut does the manufacturer require
- How much overlap is built into the design
- What finished floor will be under the doors
Where DIY framing goes wrong
Most bad installs don't happen because someone can't use a tape measure. They happen because someone measured carefully, then used the wrong target dimensions. That's a very different mistake, and it's harder to catch until the doors arrive.
Your manufacturer's installation sheet outranks every generic formula online.
If the printed instructions in the box conflict with a standard rule of thumb, trust the box. Not the blog post, not the video comment section, not the neighbor who “always does it this way.” Hardware-specific dimensions win every time because that's what your actual kit has to live with.
How to Measure Your Opening Like a Pro
A bypass door opening can fool you fast. I've seen openings look fine at a glance, then miss by enough at the floor or header to throw the whole install off once the track goes in. The tape measure was not the problem. The problem was measuring the opening the way it exists, not the way it looks from six feet back.
Start with the opening stripped down to the essential surfaces that matter. Pull off trim if it hides the jamb edges. Remove old track, carpet tack strip, or anything else that keeps you from reading the true width and height. If you measure over debris, swollen casing, or a hump in the flooring, you build bad numbers into the job before framing even starts.
Measure the opening in six places
Use a tape, not a guess.
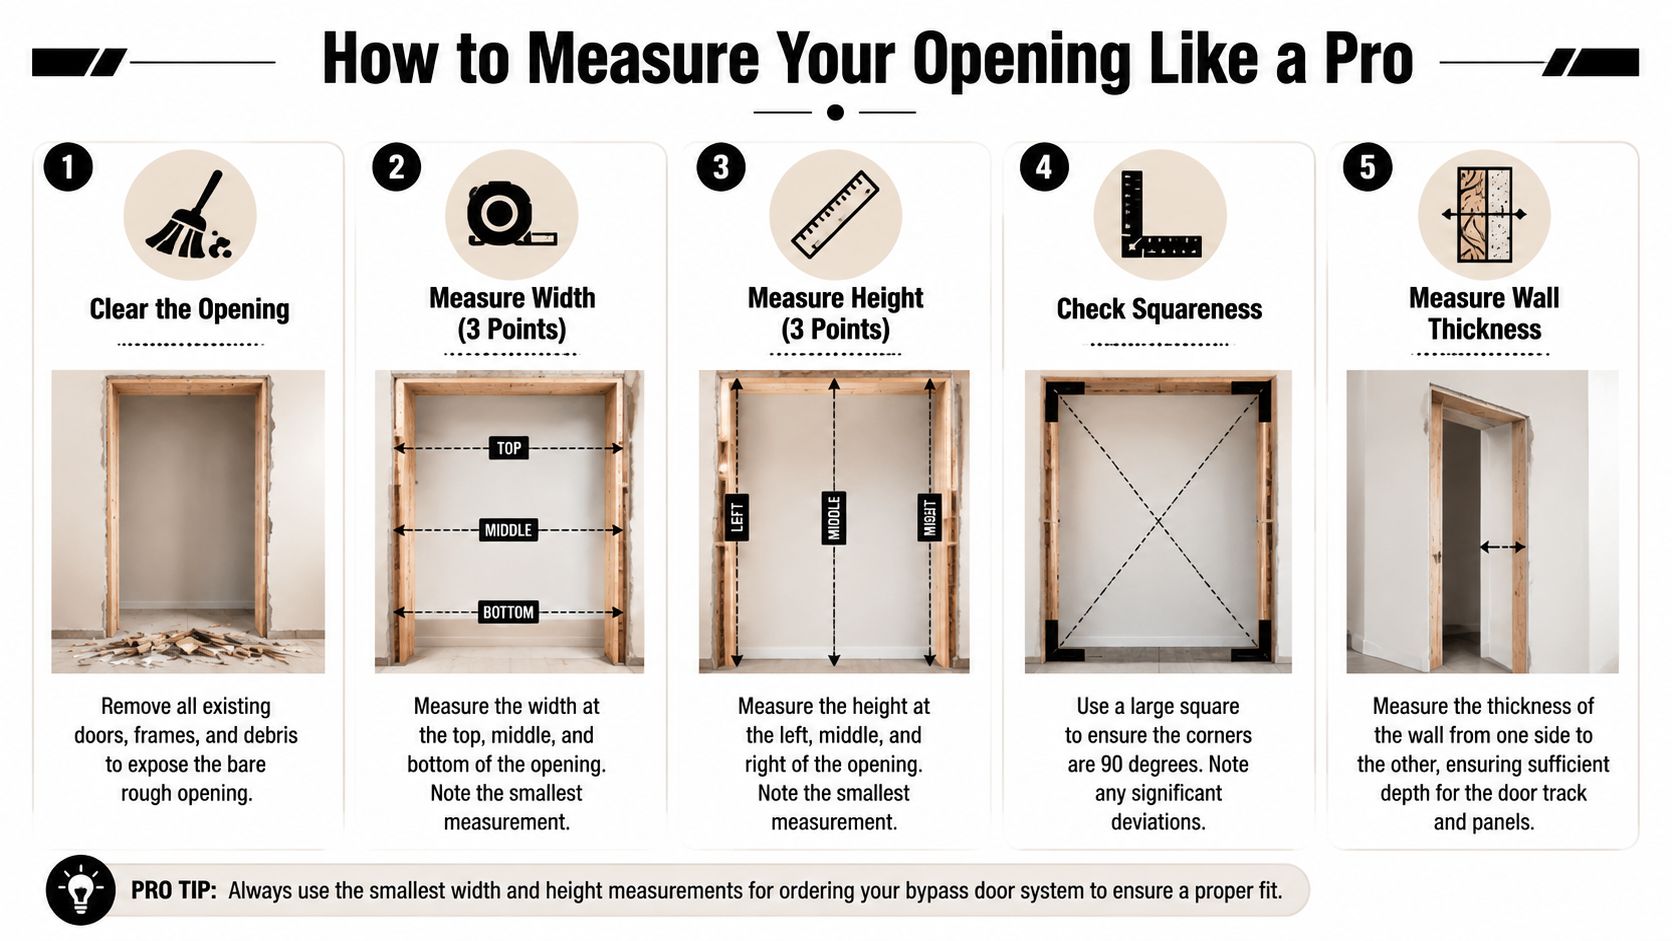
Take width at the top, middle, and bottom. Then take height at the left, center, and right. Write down all six numbers and work from the smallest width and smallest height. That is the opening your hardware has to fit inside.
Here's the field method:
- Clear the opening completely. Expose the actual edges you are measuring from.
- Measure width at three points. Top, middle, bottom.
- Measure height at three points. Left, center, right.
- Record every number. Pencil on the stud or notes on your phone both work.
- Use the smallest measurements. Bypass hardware does not care that one part of the opening is bigger.
That last point trips up a lot of DIY work. If the opening is 60 inches wide at the middle but pinches down near the floor, the floor number wins. If the header drops on one side, the low side wins.
Check the opening for shape, not just size
Width and height are only part of the job. Put a level on both sides of the opening. Check the header for level. Check the floor across the span where the guides or bottom clearance will matter. If framing is exposed, compare diagonals to see whether the opening is square enough to behave.
An opening can be large enough on paper and still install poorly if one side leans or the floor rises under one panel. That is where doors start rubbing, overlapping badly, or leaving uneven gaps that look sloppy even if the math was close.
Finished flooring matters too. Carpet, pad, LVP, tile, or hardwood can change the available height enough to affect the track position and door undercut. Measure from the finished floor if it is already in. If flooring is going in later, measure from the subfloor and write down exactly what finish is being added. Then compare that stack-up to the installation sheet for your actual bypass kit. Generic advice misses this point all the time, and it is one of the main reasons rough openings end up wrong.
A quick visual walkthrough helps if you want to see the measuring flow before picking up tools.
Calculating the Correct Rough Opening Size
A bypass opening goes sideways fast when someone frames to a chart before checking the actual kit. I see this on remodels all over northern Utah. The opening looks close, the drywall is finished, and then the track, overlap, or jamb detail calls for something different than the generic number the homeowner found online.
Start with the manufacturer sheet for the exact bypass hardware and door size you plan to use. Use online formulas only as a quick field check. If the install instructions and a generic formula disagree, the install instructions win every time.
One common baseline says rough opening width is twice the width of one slab minus 2 inches, and rough opening height is door height plus 2 ⅜ inches, according to Door Design Lab's bypass door sizing guide. Using that math, a pair of 32-inch slabs points to a 62-inch rough opening width, and a standard 80-inch door points to an 82 ⅜-inch rough opening height.
That baseline helps, but it does not build the opening for you.
APA Closet Doors sizing guidance shows the standard door sets many homeowners start with, including 48 × 80 inches for two 24-inch doors, 60 × 80 inches for two 30-inch doors, 72 × 80 inches for two 36-inch doors, and larger multi-panel options that go much wider and taller. Those common sizes are useful for a quick smell test before you cut lumber.
| Total Door Size (2 Slabs) | Baseline Rough Opening Width | Baseline Rough Opening Height |
|---|---|---|
| 48 × 80 | 46 inches | 82 ⅜ inches |
| 60 × 80 | 58 inches | 82 ⅜ inches |
| 64 × 80 | 62 inches | 82 ⅜ inches |
| 72 × 80 | 70 inches | 82 ⅜ inches |
Use that table to catch obvious mistakes. If your opening is nowhere near the pattern, stop and confirm whether the difference comes from the door kit, the jamb plan, or a bad measurement.
Here is the part many guides skip. Rough opening math changes once you account for jamb thickness, side clearance, finished opening target, track requirements, and how much panel overlap the manufacturer wants. A two-panel bypass with more overlap can need a wider opening than the old rule suggests. Height can shift too if the track assembly, floor finish, or bottom guide clearance differs from the standard assumption.
That is why I do not frame bypass openings from a one-size-fits-all formula. I frame from the submittal or installation sheet, then use the generic formula as a backstop. The same habit matters on other code-driven openings too. If you are comparing opening rules in another part of the house, Massachusetts egress window rules are another good example of why exact requirements beat rule-of-thumb advice.
The safe workflow is simple. Get the exact door size. Get the exact hardware kit. Confirm the required finished opening, then add the framing allowance the manufacturer calls for. If that number conflicts with a chart you found online, trust the kit and frame to that number the first time.
Framing and Header Best Practices
Once the numbers are settled, the framing has to hold those numbers. That means building an opening that stays put after drywall, trim, flooring, and daily use all take their turn.
A proper bypass opening is built around the same basic structure as other framed openings. The header carries load above the opening when the wall is load-bearing. The jack studs support that header. The king studs run full height and tie the assembly back into the wall framing. If any of that sounds optional, it isn't.
What matters most on site
The frame has to be:
- Plumb: The side framing needs to stand straight, or the doors will read crooked even if the track is level.
- Level: The header area and track support need a true level reference.
- Square: If the opening racks out of square, the margins won't look right and adjustment gets limited fast.
- Solid at the top: The track needs dependable backing. Loose or undersized framing leads to movement and noise.
Use a 4-foot level if you have one. A short torpedo level is handy, but it won't tell you enough across a wider opening. A speed square helps at corners, and a tape used diagonally can show if the framing is drifting out of square.
Don't treat structural work casually
If the wall is load-bearing, header sizing and support aren't guesswork. That's where homeowners can get in trouble by focusing only on the door dimensions and not the wall itself. The same logic applies in other opening projects. If you've ever looked into Massachusetts egress window rules, you've seen how quickly “just cut an opening” turns into a structural and code issue. Door openings can be the same way.
A smooth-sliding bypass door starts with rough framing that doesn't move after the house settles, the trim goes on, and the flooring changes the final clearances.
In older Utah homes, I'd also be cautious around framing that's already out of plumb or walls that have been modified before. If the studs are twisted, sister them or rework the opening now. Trying to tune bypass hardware around bad framing is a losing game.
Common Pitfalls and How to Fix Them
Most bypass door problems trace back to one of a few misses. The mistake usually shows up after the install, but the cause is almost always earlier in the process.
Bad overlap
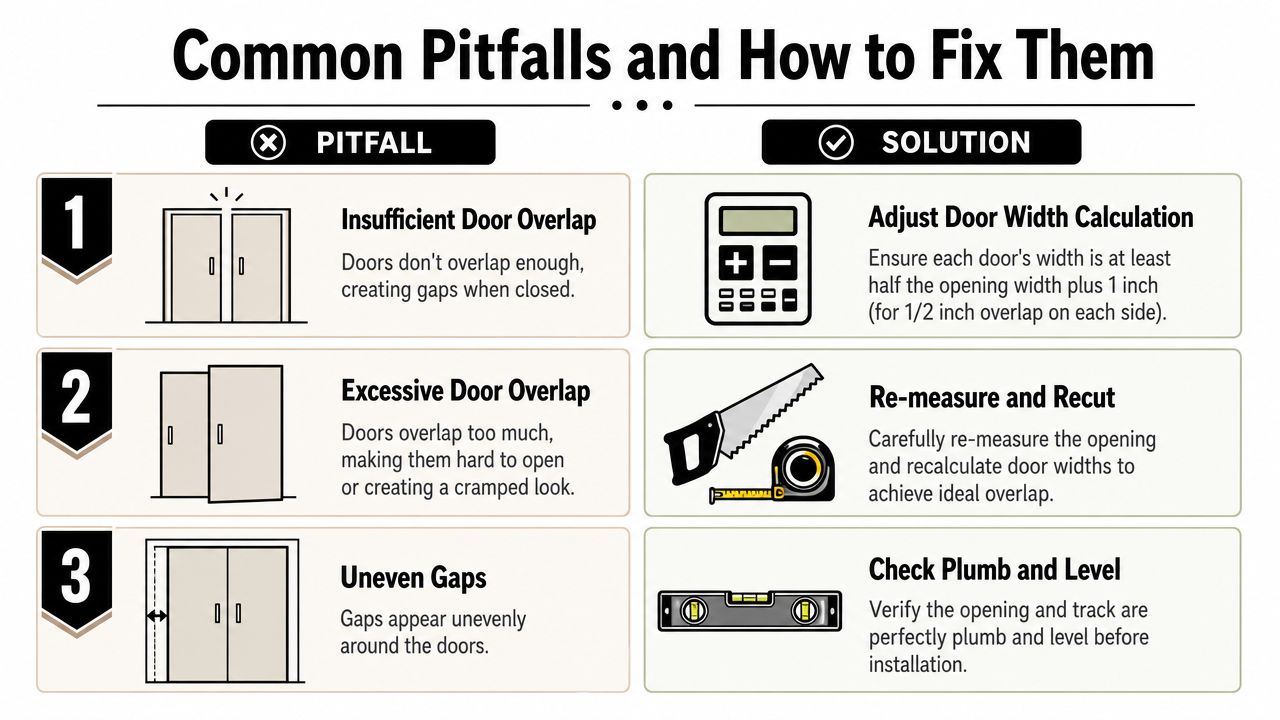
This one ruins a lot of otherwise decent installs. A manufacturer guide for bypass hardware notes that the 1-inch overlap between slabs is critical, and if the rough opening is off by even 1 inch, the finished opening can end up too large for the doors to overlap properly. That leads to doors hitting jambs unevenly or failing to line up cleanly according to Trim-Tek bypass door specifications.
Fix: If the mistake is small, you may be able to adjust with jamb build-out or hardware tuning, but there isn't much forgiveness.
Prevention: Confirm the overlap requirement before framing and before ordering slabs.
Wrong roller or track style
Homeowners sometimes order doors and assume the track is universal. It isn't. The same Trim-Tek guidance warns that failing to verify top roller vs. bottom roller hardware before ordering can create delays and force a rework when the wrong system shows up.
Fix: Stop before installation and match the hardware set to the slabs and opening.
Prevention: Read the hardware page first, not last.
Flooring surprises and out-of-square framing
A bypass install can look perfect on subfloor and start rubbing once finish flooring goes in. That's especially common when carpet or thicker floor build-up gets added after the door package is set. The other repeat offender is an opening that isn't square. The track may mount fine, but the visual gaps won't stay even.
Use this field checklist before the doors go in:
- Check floor build-up: Know what finish floor is coming and whether the clearances were based on subfloor or final floor.
- Verify the opening shape: Measure both sides, both diagonals if possible, and the level across the head.
- Dry-fit the logic: Make sure the hardware, slab size, overlap, and jamb detail all agree with each other before fastening anything permanently.
If the opening is wrong, trimming the slab rarely saves the job. Width errors are usually much harder to recover from than height tweaks.
When to Call a Professional in Salt Lake City
Some bypass jobs are good DIY projects. Some aren't. If you're replacing doors in an existing, square opening with manufacturer instructions that clearly match your conditions, you can probably handle it with a good level, a decent tape, and patience.
Call a pro when the wall may be load-bearing, the opening needs reframing, the house has settled enough to throw the walls out of plumb, or the doors are oversized and heavy. Older Salt Lake City homes can hide a lot behind drywall, including framing changes, uneven floors, and patchwork remodels from past owners. That's where a simple closet-door project stops being simple.

A professional also earns their keep when the opening has to work the first time because trim, flooring, paint, and scheduling are already lined up. Reframing after the finish work is in place costs time, creates dust, and usually means fixing more than just the opening.
If you're in the Salt Lake City area and you're already dealing with broader door, window, or exterior upgrade decisions, local experience matters. Utah climate, older housing stock, and code details can change how a clean install should be approached.
If your project has moved past simple measuring and into reframing, exterior door replacement, or larger home envelope upgrades, Superior Home Improvement is a solid Utah resource to contact. Their team works with Salt Lake City homeowners on high-performance windows, patio doors, roofing, and siding, and they understand how to get openings, fit, and finish right without turning a straightforward project into a callback.